How to recover deleted files in Windows 11/10/8/7?
Accidentally deleting files is a common issue faced by many Windows users, and it is useful to know how to restore deleted data. On this page, you will learn common scenarios that you might accidentally delete files, what happens when files are deleted, and 6 comprehensive step-by-step guides on how to recover permanently deleted files using both built-in Windows tools and third-party software in Windows 11/10/8/7. By way of these methods, you can easily get back deleted files from Recycle Bin, hard drives, USB drives, SD cards, and crashed computers.
"I'm trying to restore some deleted files from an old external hard drive. Those files are mainly videos and audio and they got deleted by accident, I downloaded several recovery apps and did a quick scanning for the external hard drive. After scanning, I was asked to save files to another hard disk and I had to buy the software first. It's OK to buy software, but I cannot make sure if my files can be recovered correctly. Does anyone know anything about how to recover deleted video files? Is paid recovery software able to restore them correctly?"
Common scenarios leading to accidental file deletion
What kind of file deletion scenarios you may come across? Deleting files is normal action, but user does it in different ways. Here're some common scenarios that you might accidentally delete files in Windows 11/10/8/7:
- Delete files by pressing combination keys of Shift + Del, and files deleted in this way will be deleted directly without being put into the Recycle Bin.
- Delete files from the Recycle Bin. Files in Recycle Bin can also be deleted again, after which they cannot be restored via Recycle Bin
- Empty the Recycle Bin, and all files and folders will be deleted.
- Files are deleted from USB flash drives, SD cards, external hard drives, pen sticks, etc.
- Files get lost during Cut & Paste process. Errors might occur during the cutting and pasting process, after which files cannot be found on the original location or destination location.
- File gets replaced when you paste a file to a location which already contains a file with same name.
- Files get deleted by viruses or malware. Malicious software or viruses can infect operating system and storage devices, leading to unwanted file deletion, data encryption, corrupted partitions, or even system instability.
- Files get deleted by disk cleanup tools when you are removing unnecessary files. Such applications can help us clear useless files and improve system performance, however, sometimes they might misinterpret files as unnecessary and delete file by mistake.
You must have experienced similar situations that you deleted files by accident from Windows computers and really wanted to get deleted files back. Files might be deleted by Shift + Delete, emptied from Recycle Bin, or removed from USB drives, and you cannot restore them directly from Windows Recycle Bin. It seems that you can do nothing when it comes to recovering deleted files, and yet the good news is that in most cases you can undelete files in Windows 11/10.
Can you recover permanently deleted files on Windows 11/10?
In Windows, when you delete a file from a local hard drive or SSD, it is typically moved into the Recycle Bin rather than being permanently removed. Files in the Recycle Bin remains untouched and cannot be restored to their original locations until you manually delete them again in the Recycle Bin, empty the Recycle Bin, or the maximum storage capacity of Recycle Bin is used up.
You must be wondering why deleted files can be recovered in Windows even after emptying the Recycle Bin. In fact, the reason is quite simple to understand. When a file is stored on your hard drive, information that records the file's size, name, location, type and so on is saved in a place which is usually file system, while file content is saved in a different location.
How does operating system read the file you stored? It reads the file information first so that it can locate the corresponding file content on your hard disk. If the file gets deleted, only the relevant information is deleted, and the real file content still remains on the hard drive. The reason why you cannot see the deleted file is that operating system marks those sectors occupied by file content as Free, so that new data can be stored there.
Therefore, deleted files are still available on hard drives before they get overwritten. File recovery software can extract remaining information on free disk sectors and restore deleted files for you. In situation like this, if you want to completely wipe a hard drive or other storage media, you should take extra steps to erase all sectors.
Next, you may wonder what kind of deleted files can be easily recovered. First, the most recently deleted files. When you realize that something important gets deleted, it's best to recover it as soon as possible. Deleted files are likely to get overwritten as time goes on, as you may write new data on the drive, operating system can generate writing operations any time, etc. Second, you can easily retrieve lost or deleted files that have been backed up to cloud drives or other devices. If you keep a backup on cloud drives or other storage devices, you can restore lost data easily. Third, files put in Recycle Bin can be restored before you empty it.
Things to know when recovering deleted files
The chances of successful file recovery depend on various factors, and it is common to see that some files cannot be correctly. Here are some things you should keep in mind before undeleting data in Windows:
- Deleted files are recoverable before they get overwritten, so you should try to protect lost data from being damaged. Do not add more data or edit existing files on your hard drive to prevent any possible writing actions.
- Data recovery software or experts cannot recover overwritten files. If files are totally overwritten, you can restore nothing; if a file is partly overwritten, it cannot be recovered correctly, for example, recovered files are corrupted.
- You can recover deleted files from USB drives, hard drives, external hard drives, virtual disks, SD cards, flash drives, etc., but you cannot do that on SSDs, as SSDs employ the TRIM technology which completely erase deleted files and makes files unrecoverable.
- If lost files were stored on the system partition (C drive) such as desktop before deletion, you should shut down system as soon as possible, and recover data under WinPE environment or connect the hard drive to another PC to recover data.
- Try and test file recovery software before you decide to buy it. Most paid software provides trial versions which allow you to scan and preview lost files, helping you make sure whether lost files can be recovered correctly.
Since deleted files are recoverable in most situations, there is no need to be panic when you face such problems. The following content will show you how to recover deleted files in Windows 11/10 via different methods.
Method 1: Restore deleted files from Recycle Bin
If you deleted files from local hard drives or SSDs, Windows operating system will put them into Recycle Bin. As long as files are not further deleted from Recycle Binn or Recycle Bin is not emptied, you are able to restore files easily in Windows. This is workable on all Windows systems like Windows 11/10/8/7/Vista/XP. To restore deleted files from Recycle Bin, please follow steps below:
Step 1. Open Recycle Bin on your computer by double-clicking its icon on desktop.
Step 2. Look for files and folders you want to restore and select them. You can filter files via name, deleted time, original location, size, item type, etc.
Step 3. Right-click on selected files and choose "Restore" option, and files will be restored to their original locations.
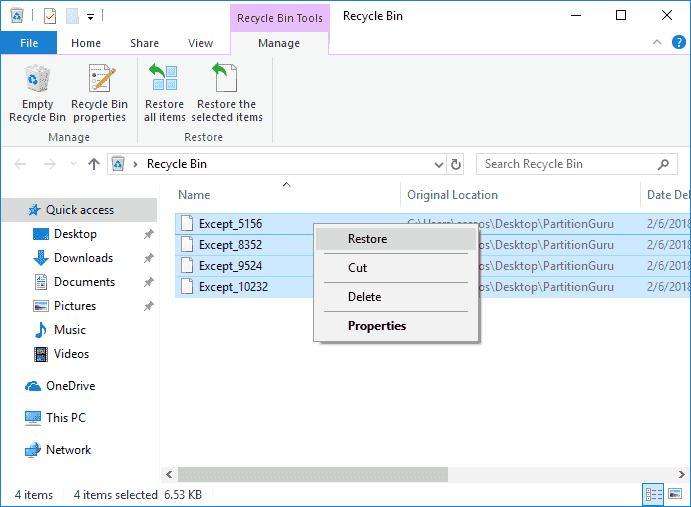
Step 4. View restored files and check if all your files have been restored correctly.
Method 2: Retrieve permanently deleted files from backups
On the occasion that you cannot find deleted files in Recycle Bin, you'll either have to use a backup or third-party recovery software to get back permanently deleted files in Windows 11/10. In this section, we'll show you how to restore deleted files from a Windows backup. If you do not keep a backup, you should move to Method 4 and Method 5 to learn how to get back deleted data using data recovery software.
Step 1. Click the searching box next to the "Start" menu and enter "Control Panel". Locate and open Control Panel where you can find and click "Backup and Restore (Windows 7)".
Step 2. Click the link "Select another backup to restore files from" under the "Restore" section.
Step 3. On the "Restore Files (Advanced)" wizard, select the backup that you want to restore files from and click "Next" button.
If the backup location you want is not listed here, connect the drive with the backup to this computer, and then click Refresh. Then follow the wizard to finish restoring files.
Method 3: Recover deleted data from previous versions
Previous versions, also referred as shadow copies, are copies of files or folders which are created in Windows as a part of restore points. It is another kind of backup created by Windows operating system. If you have such backups, you can try retrieving deleted files in this way. Honestly speaking, this way does not always work, and you can try your luck. Here're steps you need to go through:
Step 1. For Windows 11 and Windows 10 users, open Windows File Explorer and find the folder that contained deleted files.
Step 2. Right-click on the folder and select "Restore Previous Version" option from the context menu.
Step 3. Now you can see a list of available previous versions. Select the version you want to restore and click the "Restore" button.
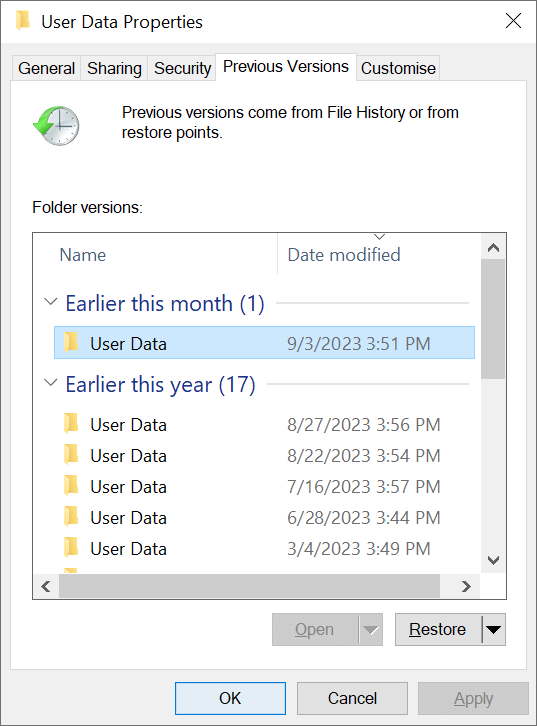
Method 4: Undelete files from hard drives using free data recovery software
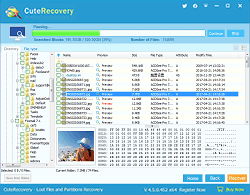
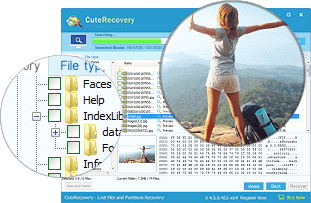
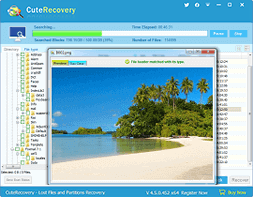
If you've tried first three solutions above and still haven't been able to restore deleted data, you can try free recovery software CuteRecovery Free (formerly known as EassosRecovery Free) which stands a good chance of getting back deleted, formatted, or lost files. CuteRecovery Free is free data recovery software which is designed for Windows users who want to recover lost or deleted files from SD cards, hard drives, external hard disks, USB disks, pen sticks, etc. The recovery process is read-only and does not cause any writing actions to original data or location.
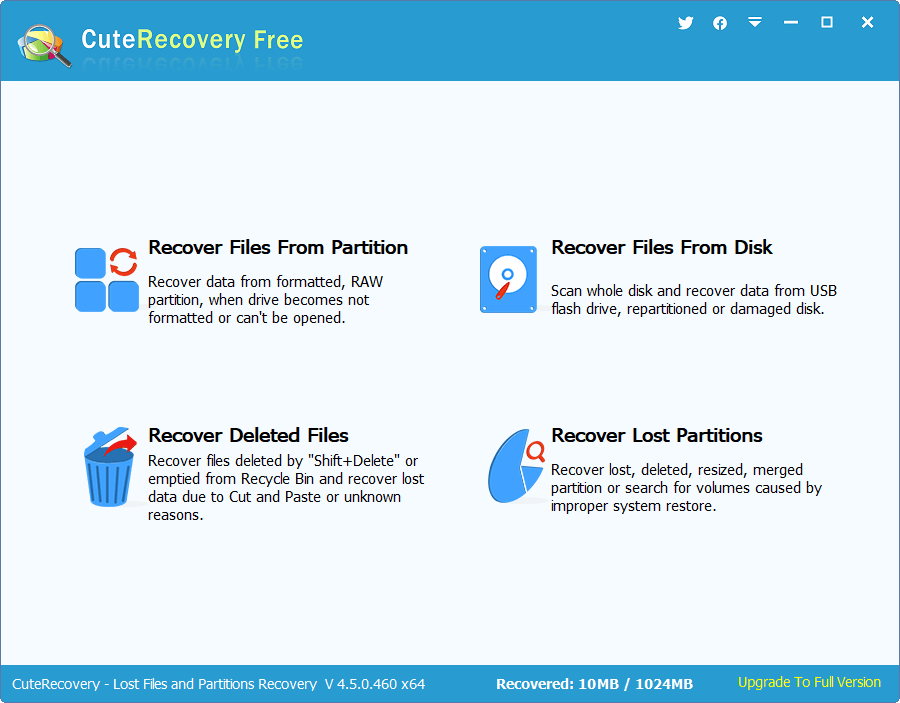
Step 1. Download, install, and run CuteRecovery Free on your computer. From the main interface, you can see supported data loss situations.
Step 2. Select Recover Deleted Files option which is designed to undelete files. This option allows you to recover deleted videos, audios, documents, photos, apps, email, archives, etc. from selected partitions or disks.
Step 3. Select where to scan deleted files. You should select the correct partition to scan deleted data, and click Next.
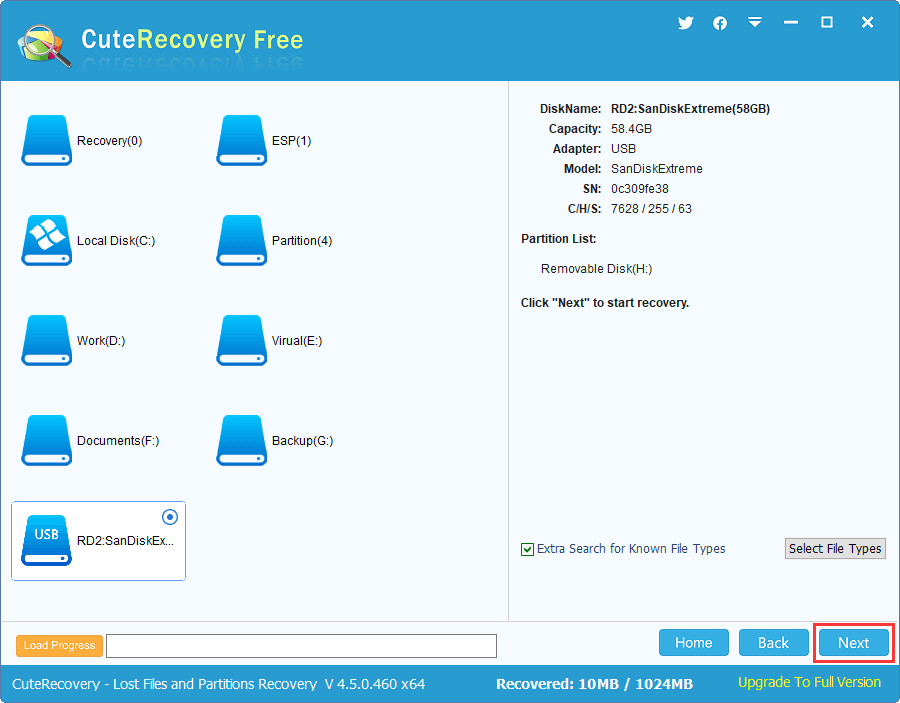
Let the software finish scanning. There is no need to do anything during the scanning.
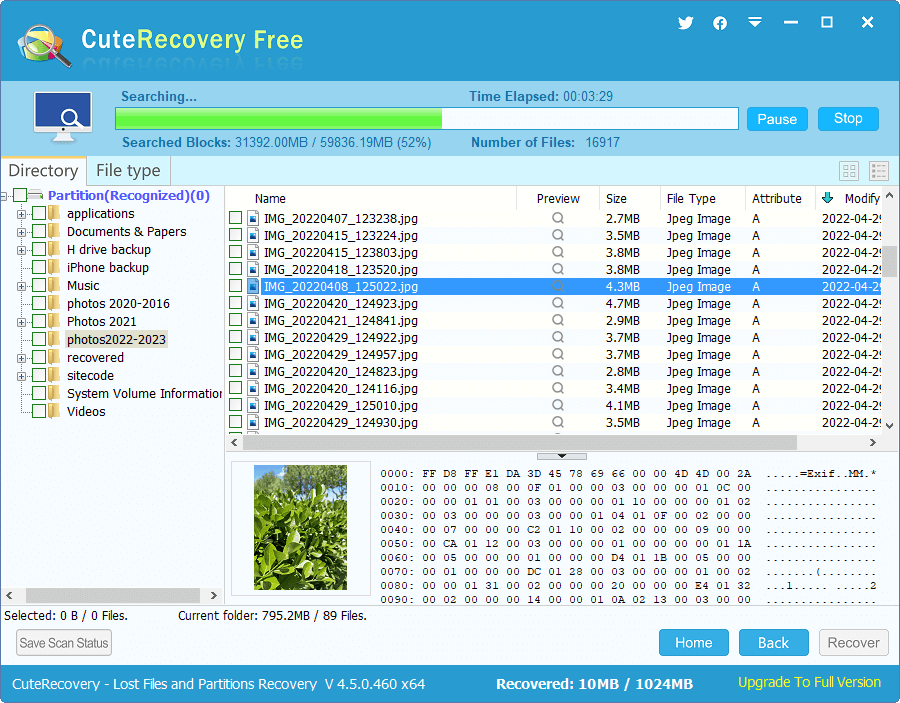
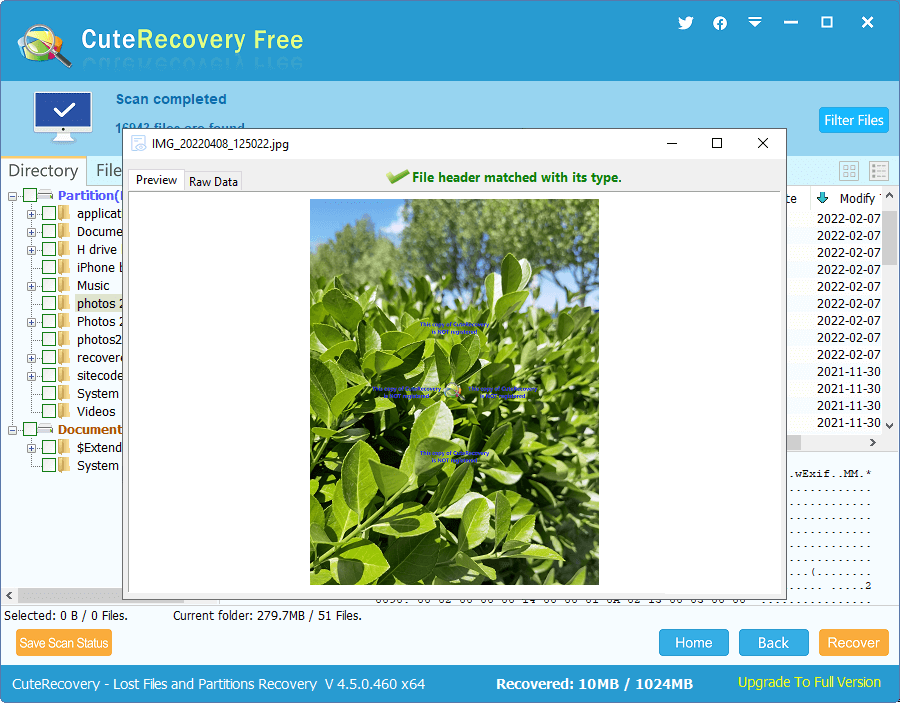
Step 4. Preview recoverable files and locate what you want to restore. File preview also helps to check whether files are recoverable.
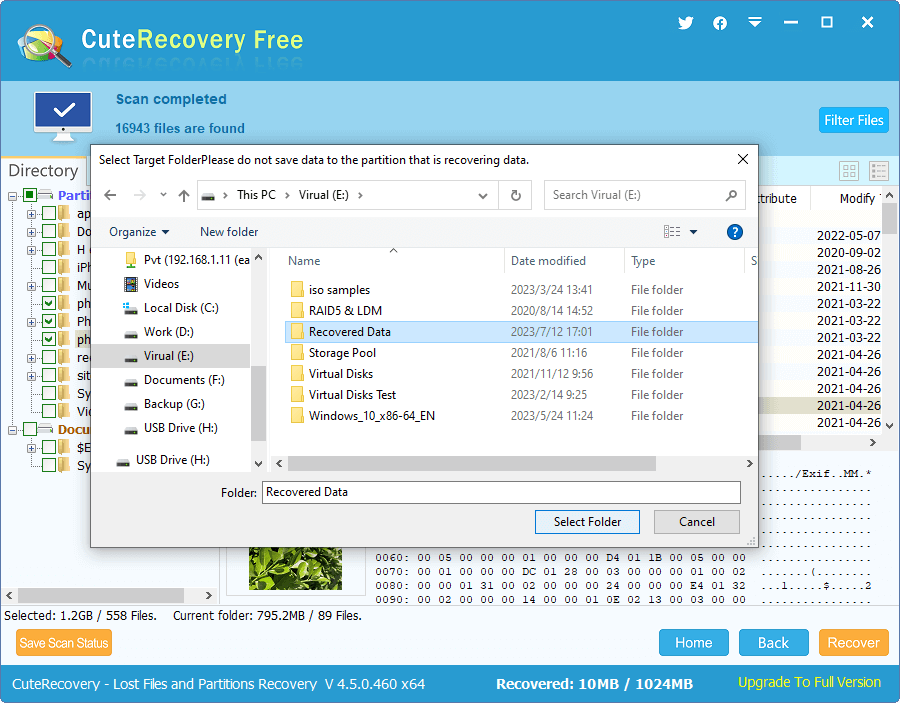
Step 5. Select files you need to recover and click Recover button. You can select or create a folder on a different partition to save recovered files.
Method 5: Recover deleted files using professional recovery software
It happens that free data recovery software cannot find out what you want, but that does not mean your files are no longer recoverable. In such cases, you can try professional data recovery software. Here we recommend DiskGenius (formerly known as PartitionGuru) to recover lost data, as this recovery software supports more complicated data loss issues and supports recovering data from NTFS, FAT32, exFAT, Ext2, Ext3 and Ext4 drives. DiskGenius Professional Edition provides a trial version which works the same when searching for lost files and partitions, thus you can test the recovery ability before purchase.
Here're steps to recover deleted and lost files from an NTFS partition using DiskGenius Professional Edition:
Step 1. Launch DiskGenius Professional Edition once it is installed on your computer. Note: do NOT install the software to the partition where you want to recover data.
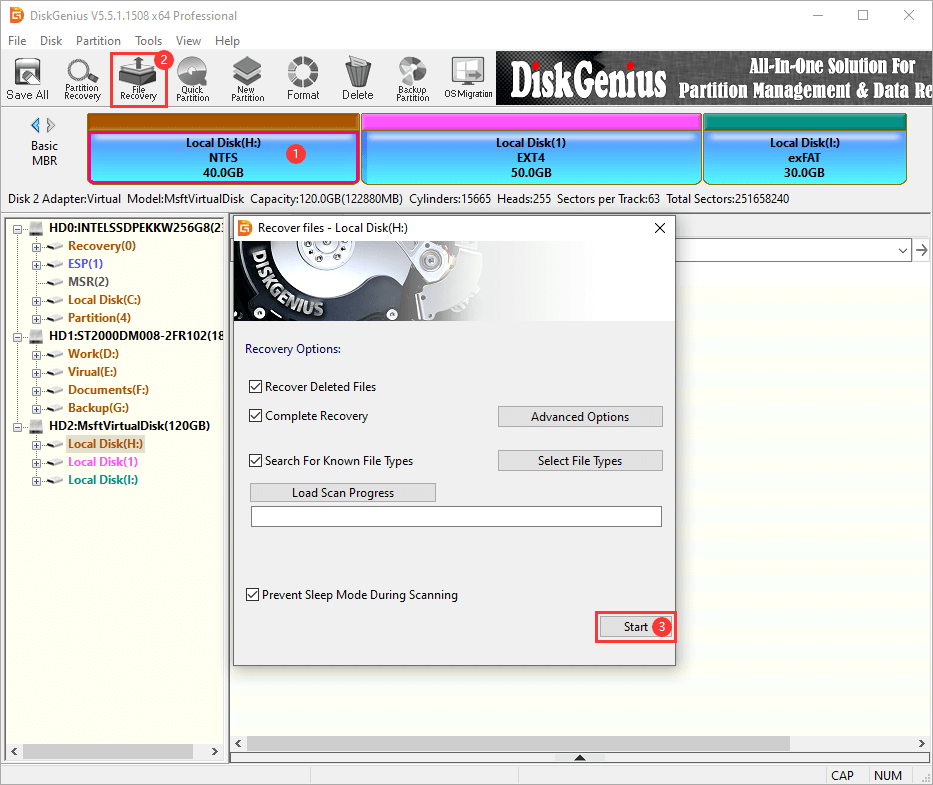
Step 2. Select the partition where you stored deleted files and click "File Recovery" button from the toolbar, which opens Recover files window, as follows. Then click "Start" button to start scanning process.
Recover Deleted Files: This option is used to search for data lost due to deletion.
Complete Recovery: The recovery mode scans the entire selected disk space, and it can find out more files, such as deleted files and formatted data.
Search For Known File Types: This option carries a deep scanning and recovers files by file type. You can select specific file types you need.
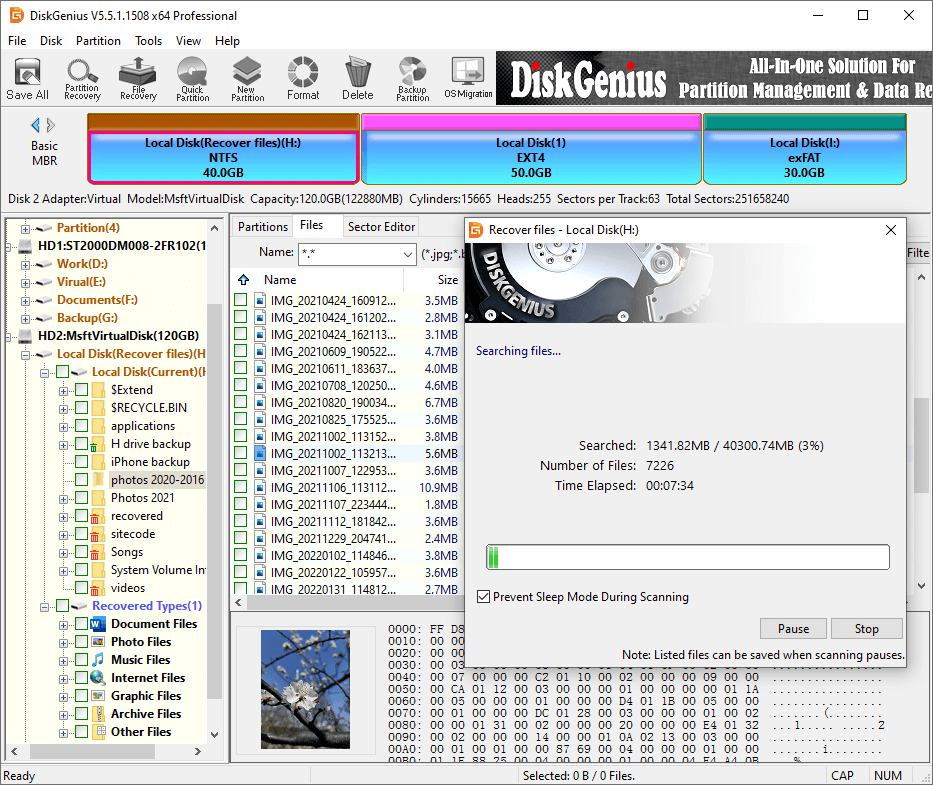
Step 3. Wait for the scanning to complete. DiskGenius displays lost files during scanning and adds files to the list once scanning finds out more files, and you can pause or stop the scanning.
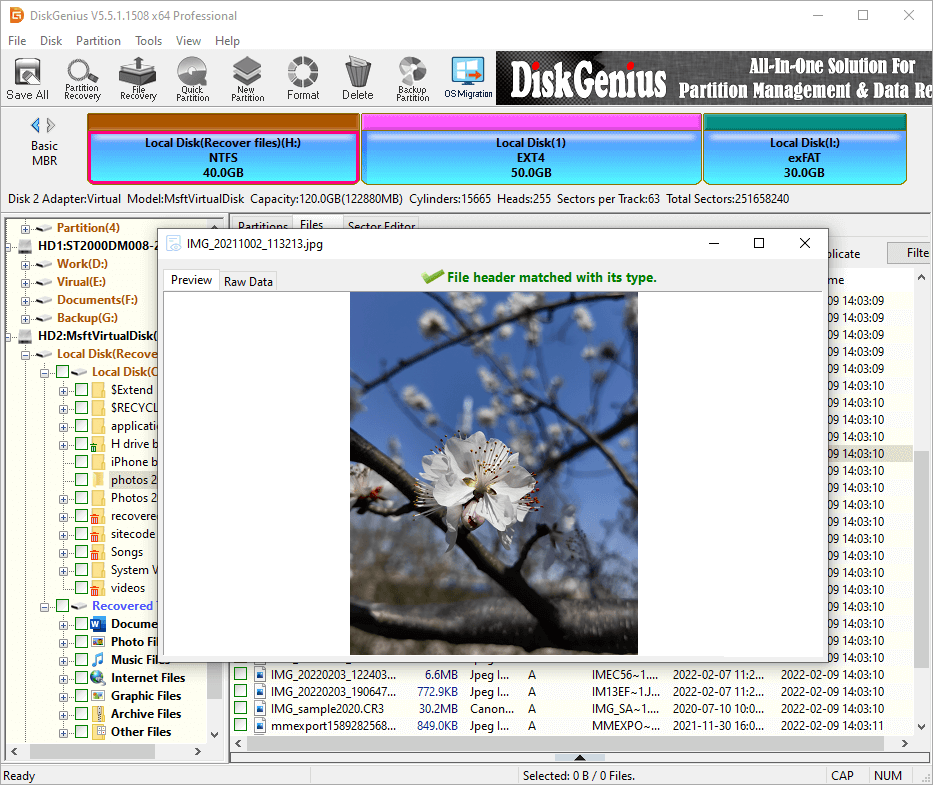
Step 4. Preview recoverable files. The file preview feature helps users to judge if files are correct. See the picture below, the photo is opened without errors, which mean the file is not corrupted.
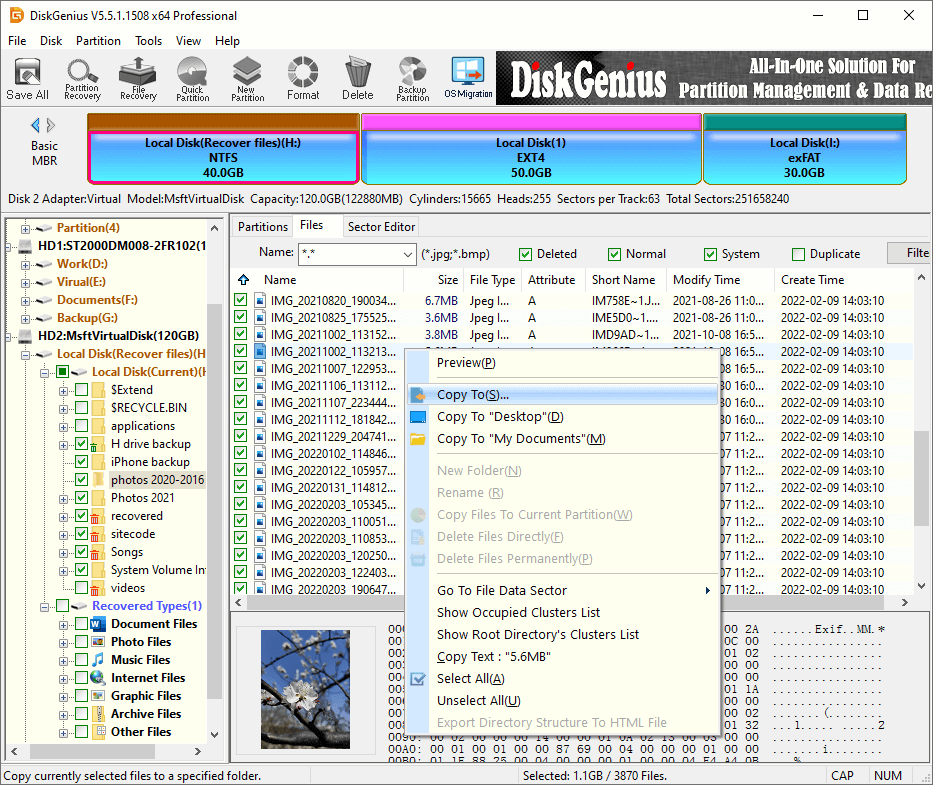
Step 5. Save recovered files to another drive. Select files and folders you are trying to recover and right-click on them to select "Copy To". Then you'll be able to save selected data to a desired location.
Method 6: How to recover deleted files from crashed computers?
When do you need to recover lost data using a bootable USB drive? There are two situations you should use a bootable USB disk to get back lost data. The first one is that computer cannot boot, for example, there is not operating system on your PC or Windows gets damaged. In such scenario, you cannot boot into Windows, and data recovery software cannot be launched either. Another situation is that you are not allowed to boot system in case of overwriting lost data, for instance, the system partition (C drive) suffers from data loss issues. If Windows keeps working, writing actions will be generated, which will finally overwrite recoverable files.
How to recover deleted files from a crashed computer? It'll be very easy if you use a data recovery program that can create a bootable USB disk. DiskGenius (formerly known as PartitionGuru), both the Free Edition and the Professional Edition, can create a bootable USB disk for its WinPE edition, after which you can boot the crashed computer and recover lost files in the Windows PE environment.
Step 1. Create a bootable USB drive.
1. Insert a USB flash drive to a computer which can boot to Windows 11/10 normally and launch DiskGenius Free Edition.
2. Select the USB drive in the software, and select "Create WinPE Bootable USB Drive of DiskGenius" option from "Tools" menu.
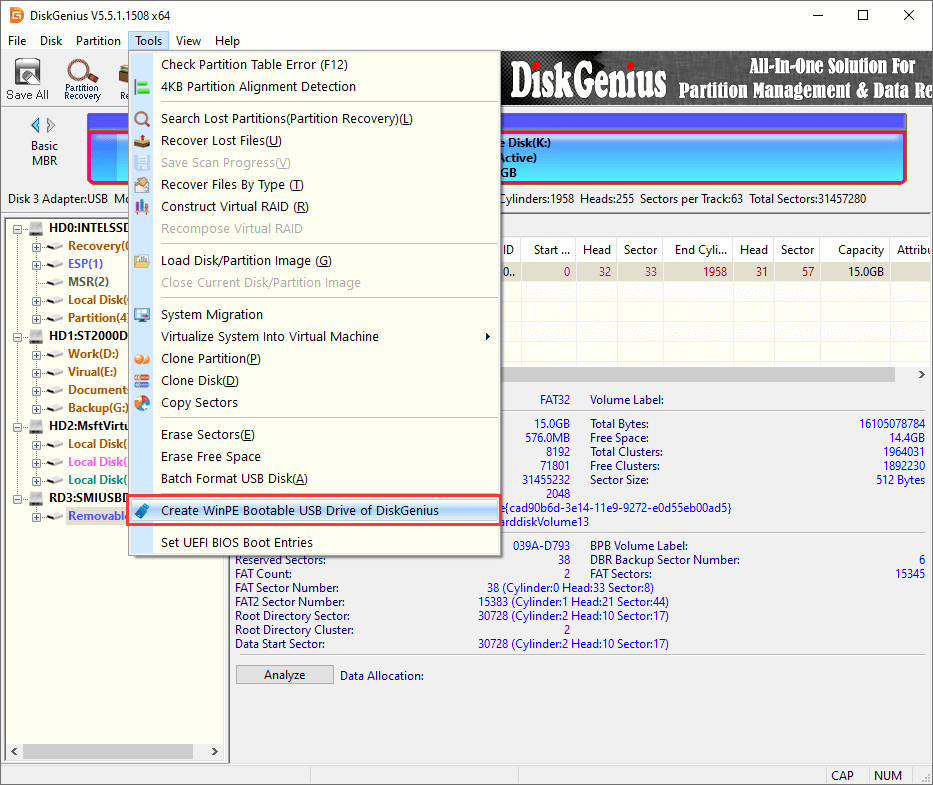
3. Click "OK" button on the popped up window and wait for the process to complete.
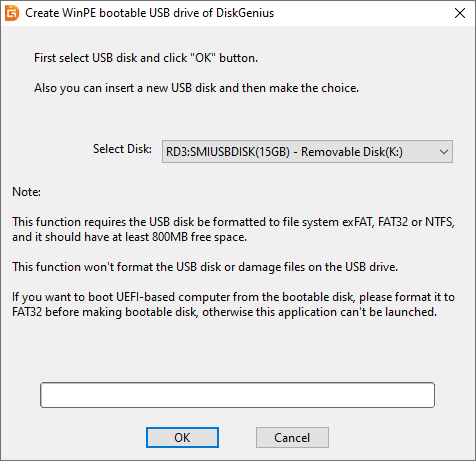
Step 2. Boot the unbootable computer with the bootable USB drive.
1. Insert the USB drive to your computer which cannot boot to system and press Power.
2. Keep pressing the key prompted in screen, which might be F2 or some other key, and enter BIOS. Change boot order and make computer boot from the USB drive. Save changes and restart computer, and computer will boot from the USB drive.
Step 3. Recover lost files or partitions.
1. When your computer boots from the USB drive, the DiskGenius WinPE version will be launched automatically.
2. Select the partition where your deleted files were stored and click "File Recovery" button.
3. Select recovery modes and click "Start" button to scan the selected drive. After scanning, you can save recoverable files to a different drive.
Conclusion
This guide provides 6 methods to restore permanently deleted files in Windows 11/10, and now you can easily get back deleted data from local hard drives, external hard drives, USB flash drives, memory cards, or recover data when Windows cannot boot. Although the process of recovering lost files in Windows is easy, if any new files overwrite lost data, you will not be able to get them back successfully. Therefore, it is best to have a backup of important files. You can either use Windows built-in tool or third-party software to back up data. If you have any questions or need any help regarding deleted file recovery, please comment or contact our support team.





 Facebook
 X
X Youtube