Undelete partition
Undelete partition step by step, simple and easy!
When data loss happens to your hard disk, in general, it always has something to do with the hard disk partition. For example, all the following conditions can lead to data loss.
- Careless operation when conducting partition causes partitions deleted accidentally;
- When you restore systems by using backup software such as Norton Ghost, original partitions disappear in which there are important data;
- Due to some reasons like virus, some partition cannot be opened, and system prompts that the partition needs formatting;
- A certain partition disappears suddenly out of unknown reasons.
This article, step by step, gives a detailed introduction of how to undelete partition. After finishing reading this article, you'll be able to become an expert of undelete partition!
The article is a bit long, you can click the following links and read the corresponding content directly!
Step 1 - A brief introduction of partition, primary partition, extended partition and logical partition;
Step 2 - Choose the best undelete partition software, CuteRecovery and DiskGenius;
Step 3 - Select right recovery mode, Recover Files From Partition or Recover Lost Partitions;
Step 4 - Recover Files From Partition, choose partition and search files and folders;
Step 5 - Recover Files From Partition, Choose the files and folders;
Step 6 - Recover Files From Partition, Save the recovered files and folders;
Step 7 - Recover Lost Partitions, select the hard disk and search for partition;
Step 8 - Recover Lost Partitions, how to decide whether to keep it or not, when you find a partition;
Step 9 - Recover Lost Partitions, save files and floders from the recovered partition;
Step 10 - Recover Lost Partitions, save recovered partitions;
Step 11 - Recover Lost Partitions, problems that should be noticed.
Undelete Partition Step 1 - A brief introduction of partition, primary partition, extended partition and logical partition
a. Partition
A hard disk can not be used by operating system directly. It must be divided into one or several partitions, and only after this can it be used by the operating system to store data.
b. Primary partition
Primary partition is the most basic type of partition, which owns the following several features:
- Within the primary partition no more partitions can be subdivided;
- Operating system is usually installed in the primary system;
- A hard disk has at least one primary partition and at the same time has as many as four primary partitions.
c. Extended partition and logical partition
From above we know that a hard disk can have four primary partitions at most, thus how to divide partition into more than four partitions? This will need to use extended partition and logical partition.
To divide a hard disk into more than four partitions, we have to use extended partition and logical partition. Extended partition and logical partition has the following features:
- A hard disk can contain only one extended partition at most;
- The number of primary partition and extended partition can not exceed four;
- A hard disk has at least one primary partition and at the same time has as many as four primary partitions.
- Extended partition cannot be used directly, it must be subdivided into one or multiple logical partitions;
- Logical partition, within extended partition, can be directly used by operating system.
d. Example of common configurations
The above picture shows the most common situation of computer disk and partition.
A computer is equipped with a hard disk (HD0: HITACHIHTS...), and the hard disk contains a primary partition (Local Disk), whose drive letter is C, and an extended partition which includes several logic partitions whose drive letters are D: E: F: ...etc.
Above all is the most basic knowledge about disk and partition, which will help you a lot with your operation of undelete partition.
Undelete Partition Step 2 - Choose the best undelete partition software, CuteRecovery and DiskGenius
Would you like to learn what the best undelete partition software is? Let me tell you, it's CuteRecovery.
CuteRecovery
CuteRecovery has powerful undelete partition functions, meanwhile it is the easiest one to operate. Its wizard interface allows you to know how to recover partitions only by a glimpse of it!
Other parts of this article, taking CuteRecovery as the tool, devote to explaining how to undelete partition step by step!
DiskGenius
If you are a computer professional, DiskGenius may fit you better. DiskGenius is All-In-One solution for data recovery and partition management, including powerful function of undelete partition. It will make you fondle admiringly when you using DiskGenius. If you want to know more about DiskGenius, please visit www.eassos.com/partitionguru.php.
Undelete Partition Step 3 - Select right recovery mode, Recover Files From Partition or Recover Lost Partitions
Now, let's start the operations of undelete partition!
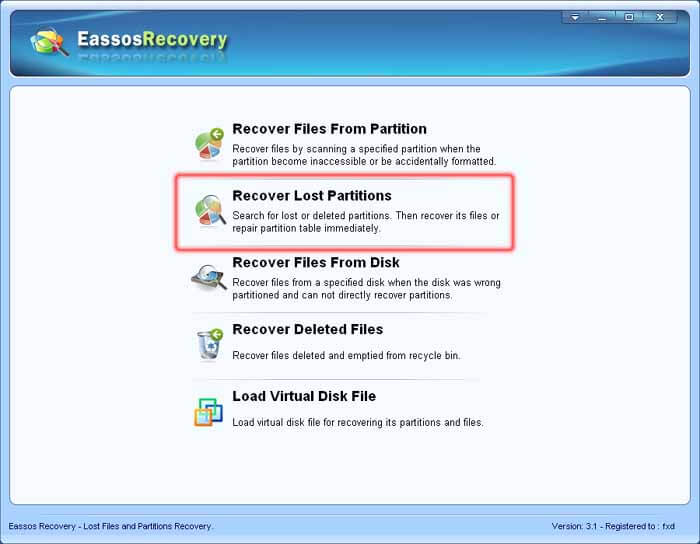
Run CuteRecovery, you'll see the following main interface:

The operation of undelete partition usually uses the first two recovery modes: Recover Files From Partition or Recover Lost Partitions.
Which mode do we actually use? In fact, CuteRecovery has already explained clearly in the main interface!
Recover Files From Partition
Please use this mode to undelete partition if the drive letter of the partition still exists. The partition is just formatted by accident or inaccessible due to some reasons.
Recover Lost Partitions
Please use this mode to undelete partition if the drive letter of the partition has disappeared, commonly due to deleted partition carelessly, or partition disappears suddenly out of unknown reasons.
When you restroe Windows system with backup software such as Norton Ghost, the original partitions may be lost with wrong operation or other reasons. In this case, you should use Recover Lost Partitions mode also.
Next, we'll explain the detailed operations about the undelete partition mode of Recover Files From Partition. If you want to learn Recover Lost Partitions at once, please visit here.
Undelete Partition Step 4 - Recover Files From Partition, choose partition and search files and folders
Click Recover Files From Partition in the main interface of CuteRecovery, and the following interface will appear.
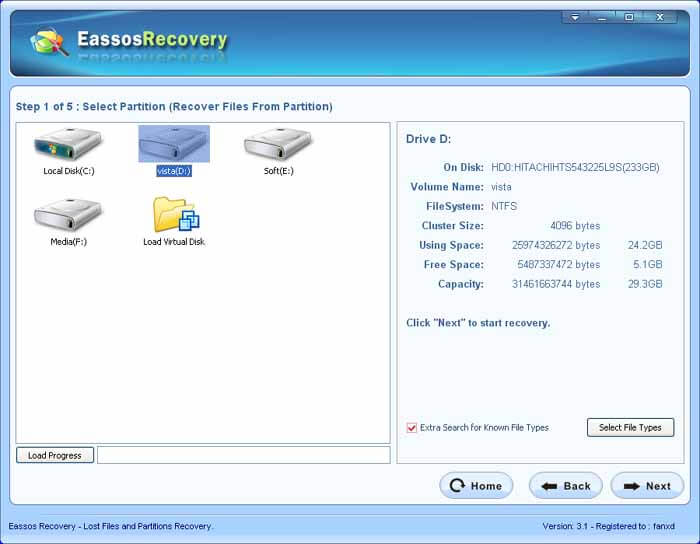
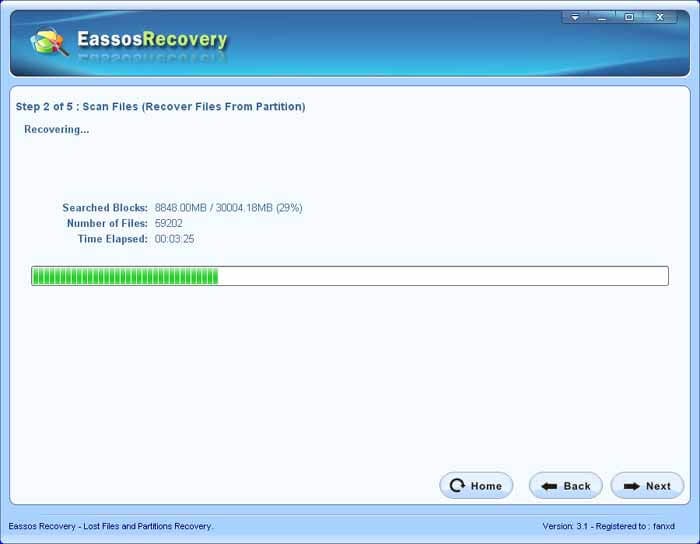
First choose the partition that needs recovering, and then click the button "Next". CuteRecovery will start to search for files and folders, as shown below:
Undelete Partition Step 5 - Recover Files From Partition, choose the files and folders
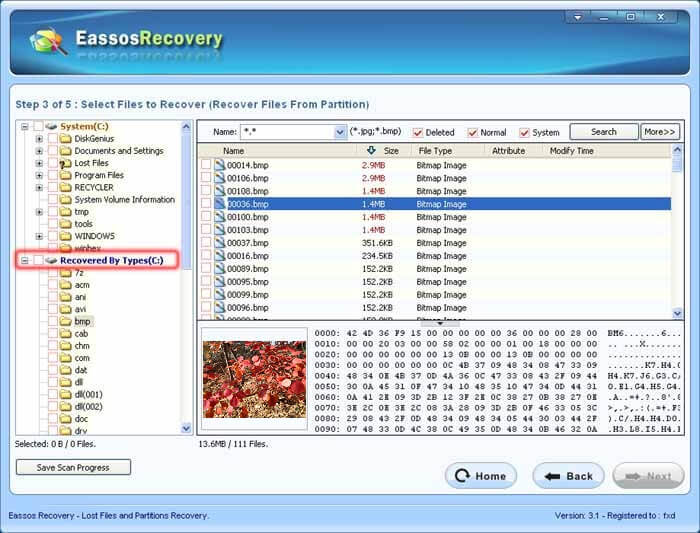
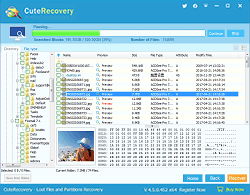
Having finished searching, CuteRecovery will sort out and show the files and folders it has found out, as shown below:
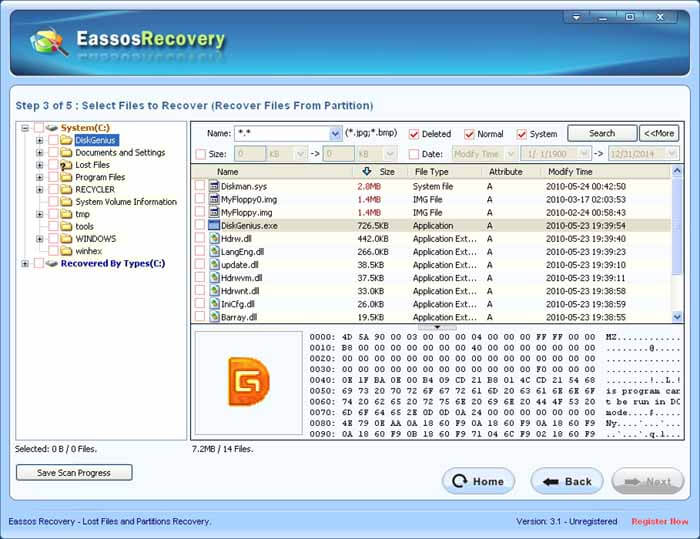
It is very convenient to find the files and folders you want to recover, whose operation is similar to that of Windows Explorer. The following skills can help you filter files and directories better.
a. You can use filename wildcard to screen the search range of files and directories, which is shown as following:

b. You can just check "Deleted" to narrow down search range, which is shown in the following picture.

c. You can narrow down the search range by limiting files' size and modification time, as shown in the below picture.

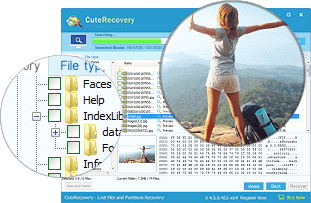
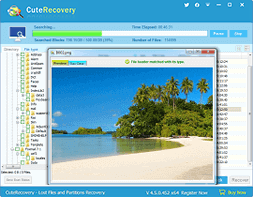
d. By way of previewing, you can judge whether the file is the one you want to recover, just as the picture shows below.

e. Double click the preview window, and you can preview the file in the normal size! As the following picture shows.
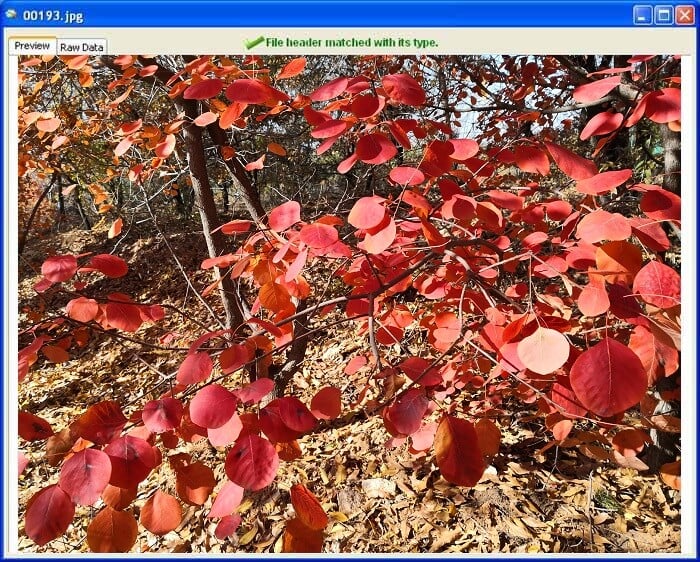
The preview supports all formats of image files, txt fiels, and Office document files such as Word Excel and PowerPoint files .
f. When you can't find the files that need recovering by adopting other methods, you can try Recovered By Types to see whether it has the wanted files!
Undelete Partition Step 6 - Recover Files From Partition, save the recovered files and folders
Having found the files you need to recover, check the file or folder and right click the mouse, and you can immediately copy the file or folder from the pop-up menu, as shown below:

You can also click the button "Next", and select a destination folder, as shown in the following picture.
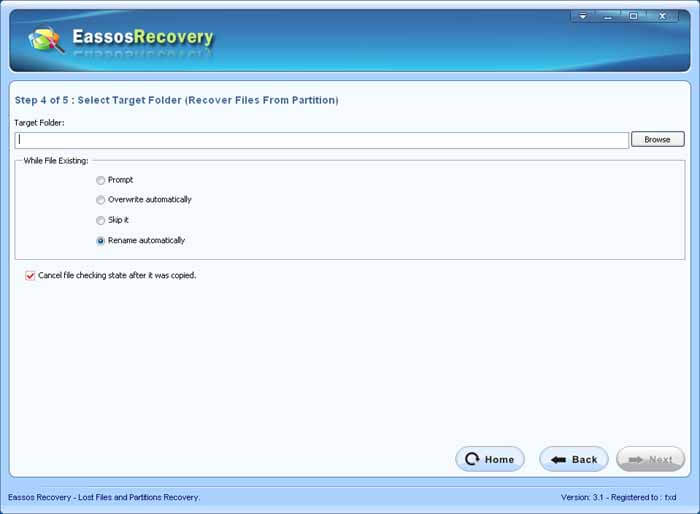
Click "Next" button, then CuteRecovery will copy the files and folders you choosen to the destination folder.
Next, we will explain the other undelete partition mode : Recover Lost Partitions.
Undelete Partition Step 7 - Recover Lost Partitions, select the hard disk and search for partition
First, we should have a clear understand of in what condition we need adopt the undelete partition mode: Recover Lost Partition;
We have made a detailed explanation of this matter before, please refer to "Undelete Partition Step 3 - Select right recovery mode, Recover Files From Partition or Recover Lost Partitions".
To let you have a better understanding of the recovery mode "Recover Lost Partition", we'll explain it at length through an actual case.
The following picture shows the actual hard disk partition settings of the author's computer by using the DiskGenius.
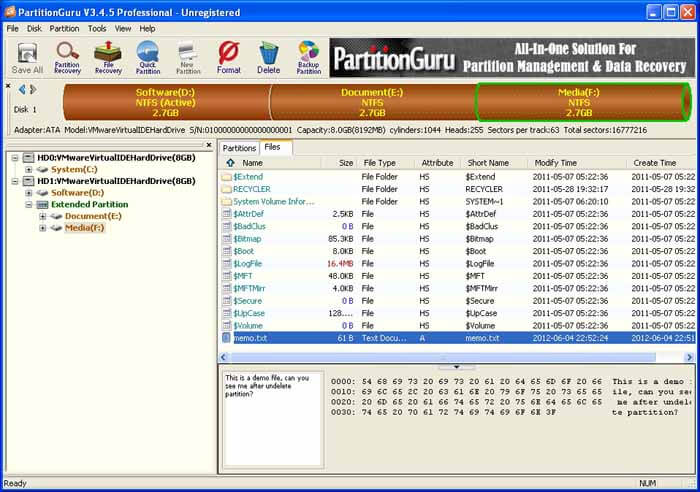
The computer has two hard disks (HD0 and HD1); HD0 has a primary partition, and HD1 has a primary partition whose drive letter is D: and an extended partition which has two logic partitions named as E: and F: .
As to some concepts like primary partition, extended partition and logical partition, this article has given a brief introduction of these concepts before, and readers who are not familiar with them can prefer to Undelete Partition Step 1 - A brief introduction of partition, primary partition, extended partition and logical partition..
Please pay attention to the volume label, location and space occupation of partition D, E and F in the HD1, which is very useful to the later undelete partition!
In addition, please note that there is a text file "memo.txt" in the roor folder of partition F , through the document preview function of DiskGenius, we can see the content of the file "memo.txt": this is a demo file, can you see me after undelete partition?
To demonstrate how to undelete partition, the author deleted the partition F, and the disk partition structure is shown in the following picture:
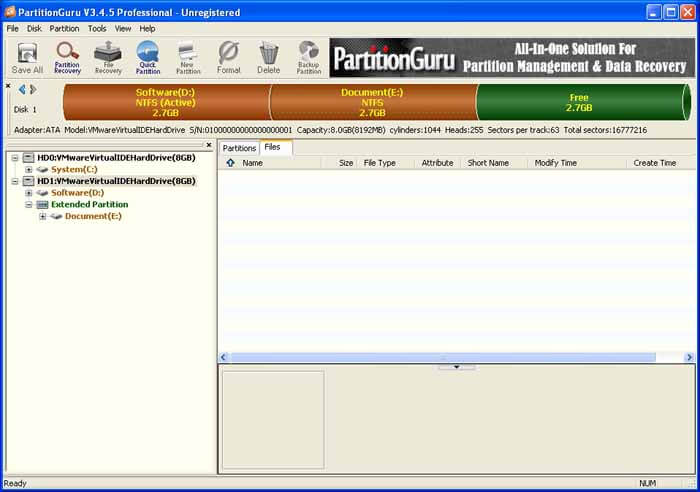
Now we use CuteRecovery to recover the deleted partition F step by step.
Start CuteRecovery and select "Recover Lost Partition" in the main interface, as shown below:
Select the hard disk that needs recovering lost partition, and then click the button "next", as the following picture shows:
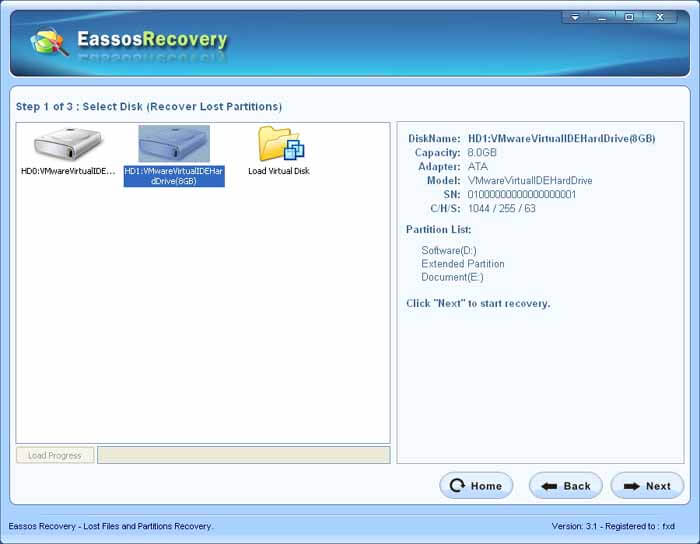
CuteRecovery will start to scan hard disk and looks for partitions.
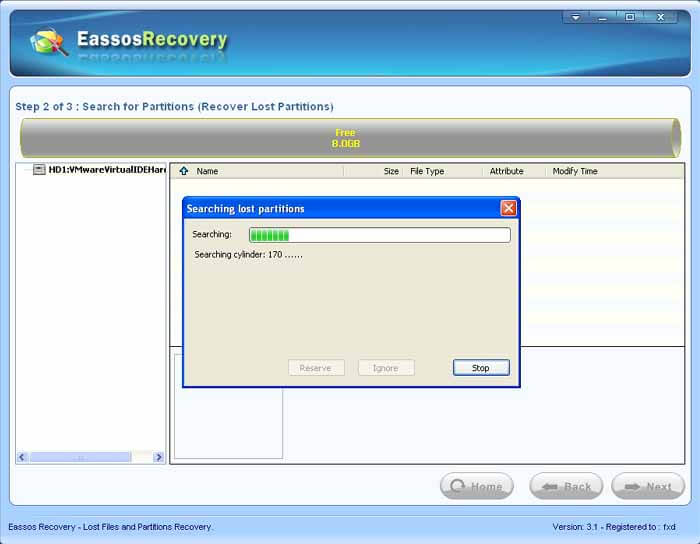
Undelete Partition Step 8 - Recover Lost Partitions, how to decide whether to keep it or not, when you find a partition
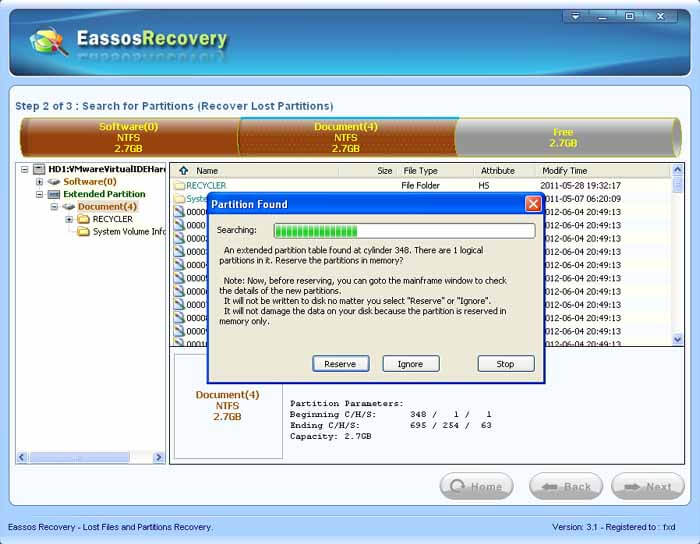
Once CuteRecovery finds a partition in the hard disk, it'll display related information and prompt user whether he needs to keep the partition, as shown below:
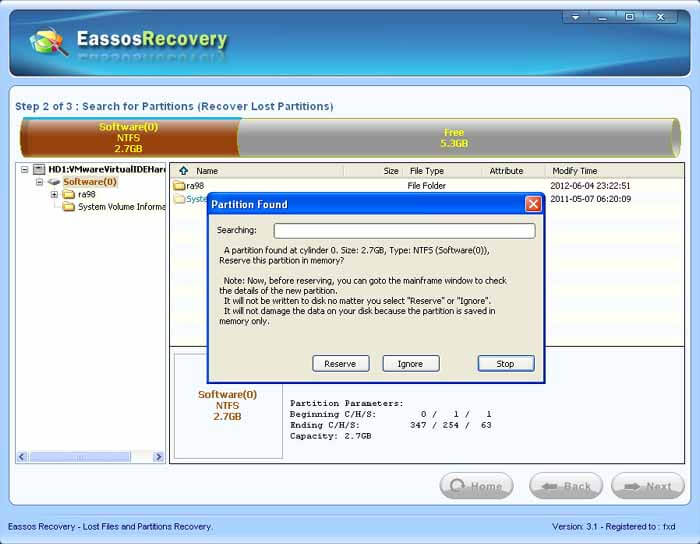
Having found partition, how to decide whether the partition should be kept? In fact, according to the methods below it's easy to judge!
1. According to the partition's location, size and volume label, you can decide whether the partition should be kept;
2. By checking the files and folders in the partition, you can decide whether the partition should be kept.
As shown above, judging from its location, size, and volumn label, the partition, which has been found, is obviously the original primary partition D , and it should be kept!
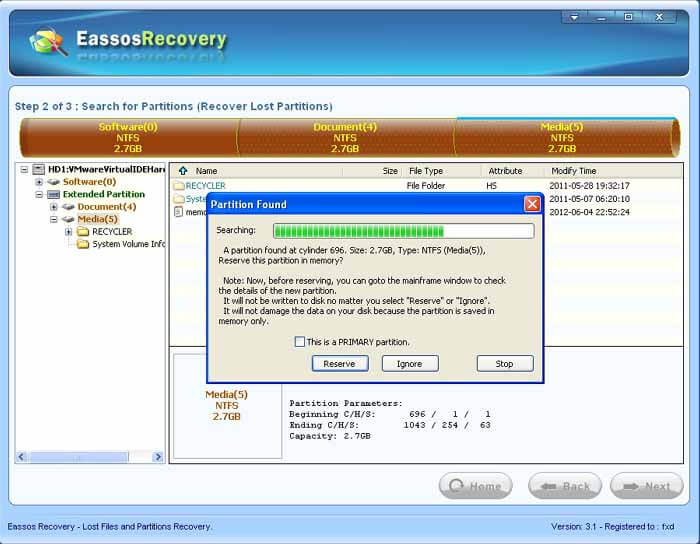
After keeping the partition, continue to search, and new partition is searched out again, which is shown in the picture below:
This time an extended partition and its first logical partition are found. Usually, after CuteRecovery finds an extended partition, it finds the extended partition's first logical partition meanwhile, as the above picture shows.
Judging by the logical partition's location, size and volume label, the partition is the original primary partition E , and it should be kept!
After keeping the partition, go on searching, and new partition is found again, shown as below:
On the basis of the partition's location, size, volume label and the files and floders it contains, we can judge this partition is just the partition F we deleted, i.e. it is the partition we want to recover, so it should be kept!
Undelete Partition Step 9 - Recover Lost Partitions, save files and floders from the recovered partition
After finishing the partition scanning in the disk, CuteRecovery will prompt the user, as shown below:
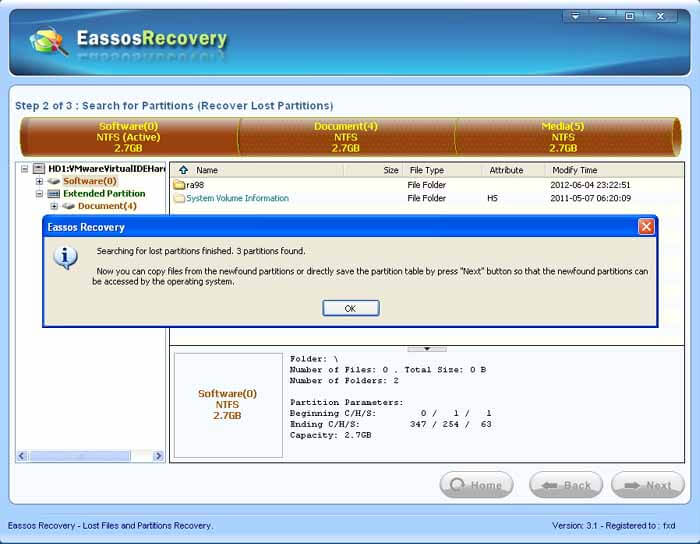
Then, CuteRecovery will display the partitions and their files and directories the user has kept, as shown below:
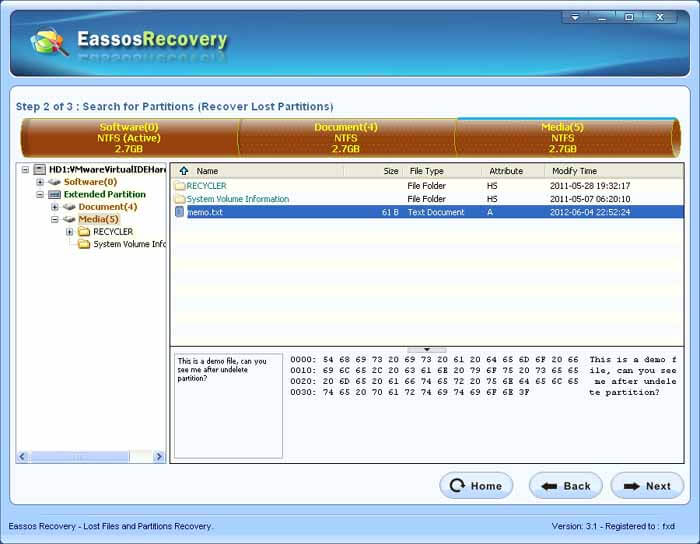
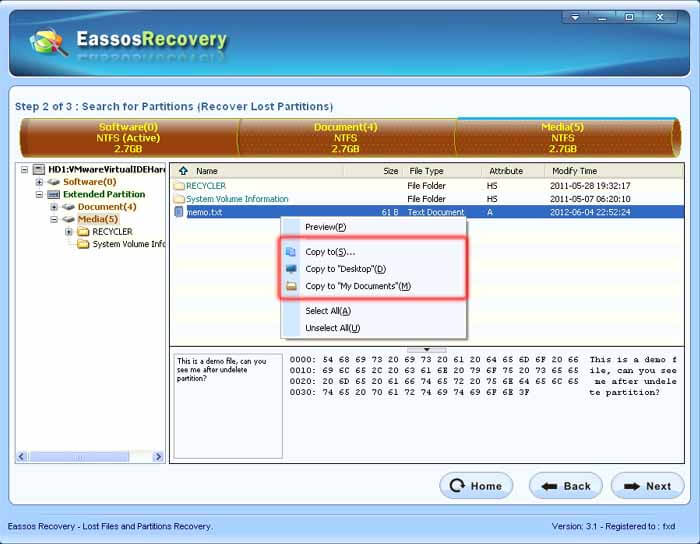
Now the user can copy the files and folders from the recovered partition. Select the file or directory and then right click the mouse button, as follows:
Undelete Partition Step 10 - Recover Lost Partitions, save recovered partitions
If there are many files and folders in the recovered partition, it'll take a lot of time and extra disk space to copy them, thus, you can also select not to copy data but recover partitions in situ directly!
In-situ partition recovery is one of the most exciting functions of CuteRecovery.
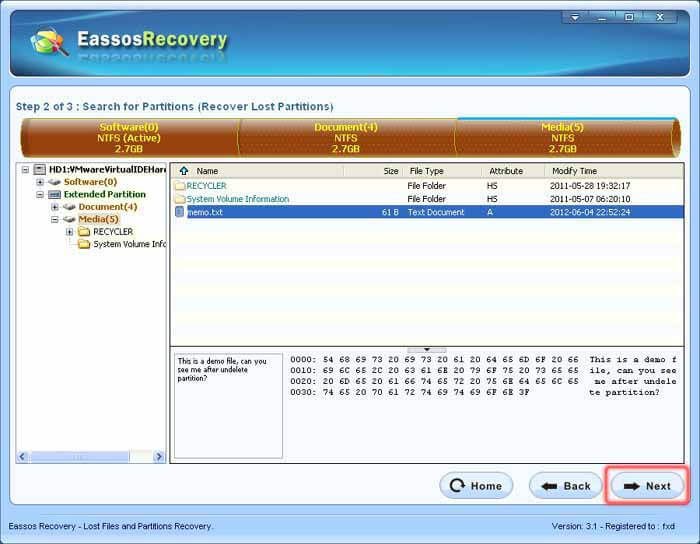
As the following picture shows, click the "next" button:
Before saving partition table, CuteRecovery will display some points for attention, as shown below:
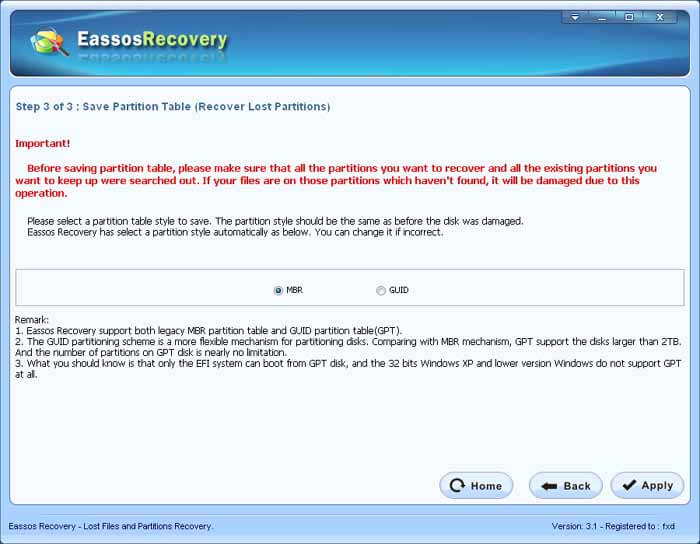
Click the "apply" button to save partition table, and the deleted partition will be recovered in situ directly!
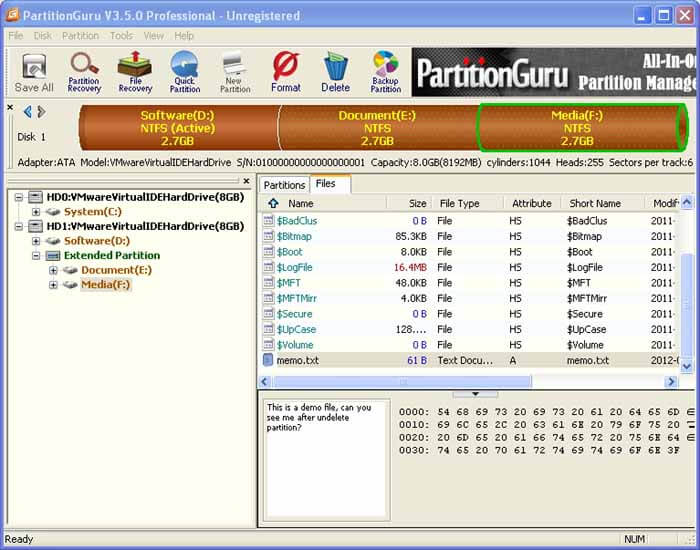
Recheck the disk partition structure by using DiskGenius, you'll find partition F has been recovered successfully, and file "memo.txt" exist in the root folder and the file content is correct also, as the following picture shows:
Undelete Partition Step 11 - Recover Lost Partitions, problems that should be noticed
As you have seen, recovering lost partition by using CuteRecovery is convenient and quick; even though you know little about computer, you can learn to use it easily!
Because of the complexity of in-situ partition recovery, in some cases, some of the following problems will appear occasionally, and you need to know how to deal with them.
1.After recovering lost partitions in situ, the operating system is in error, and the Windows can not be entered again
This phenomenon is common after the faulty operation of Ghost and in-situ partition recovery, which is easy to understand, for the current partition C is replaced by the original one, and some files of the original partition C are covered, therefore, the Windows can not be entered.
How to deal with it? It's very easy, just re-do the Windows system and it'll be OK!
2.Recover lost partition in situ finished, some partitions don't have drive letter
This problem is caused by Windows' mechanism of distributing partition's drive letter; although the chance of such situation is very small, you need to know how to deal with it!
First, restart Windows to see whether drive letter can be distributed automatically, if not, just distribute it manually by using DiskGenius or Windows' built-in disk management tools.
The most reliable way is copying out important data before the in-situ partition recovery, and it will be perfectly safe!


 Facebook
 X
X Youtube