This article provides solutions to “The format did not complete successfully” error on USB disk, SD card, external HDD, etc. If you receive this error and cannot format drives in Windows 10/8/7/Vista/XP, you can find a solution here.
Error description of “The format did not complete successfully”
When you attempt to format a USB disk such as pen drive, SD card or USB flash drive in Windows Disk Management, there is a chance you can’t format it and receive an error message on Virtual Disk Manager message box “The format did not complete successfully”, as follows: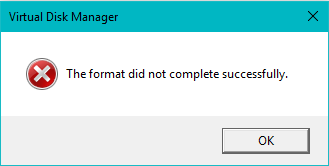
Here is one of such cases:
“Hi, I am using a Samsung SSD where Windows is installed. I need storage so I buy a 2TB hard drive. The problem occurs when I try to format the disk to NTFS and thus I can’t use it to save data. Here is what I’ve done: open Disk Management and right-click the drive to select “New Volume”. Then format it to NTFS and get the message the format did not complete successfully. If I format it in File Explorer, what I get is ‘Windows was unable to complete the format’. The clean command stills fails in Command Prompt with I/O device error.”
Reasons why the format disk not complete
- Operating system does not detect the drive correctly if storage device is not properly setup or jumped.
- Virus or spyware damage which conflicts with installed applications and Windows built-in utilities such as format utility.
- Partition that Windows can’t format is corrupted or damaged, which disturbs formatting process.
- The disk to be formatted contains bad sectors or other physical defectives.
- BIOS or hard drive drivers on your computer are not up to date or Windows does not install the latest Service Packs, thus Windows fails to address or recognize drive parameters correctly
Step 1: Recover lost data from the drive that cannot be formatted
DiskGenius (old name PartitionGuru) is an excellent partition manager as well as data recovery program which supports recovering data from RAW or corrupted partition. The following part tells how to retrieve data from drives that cannot be formatted in Windows.
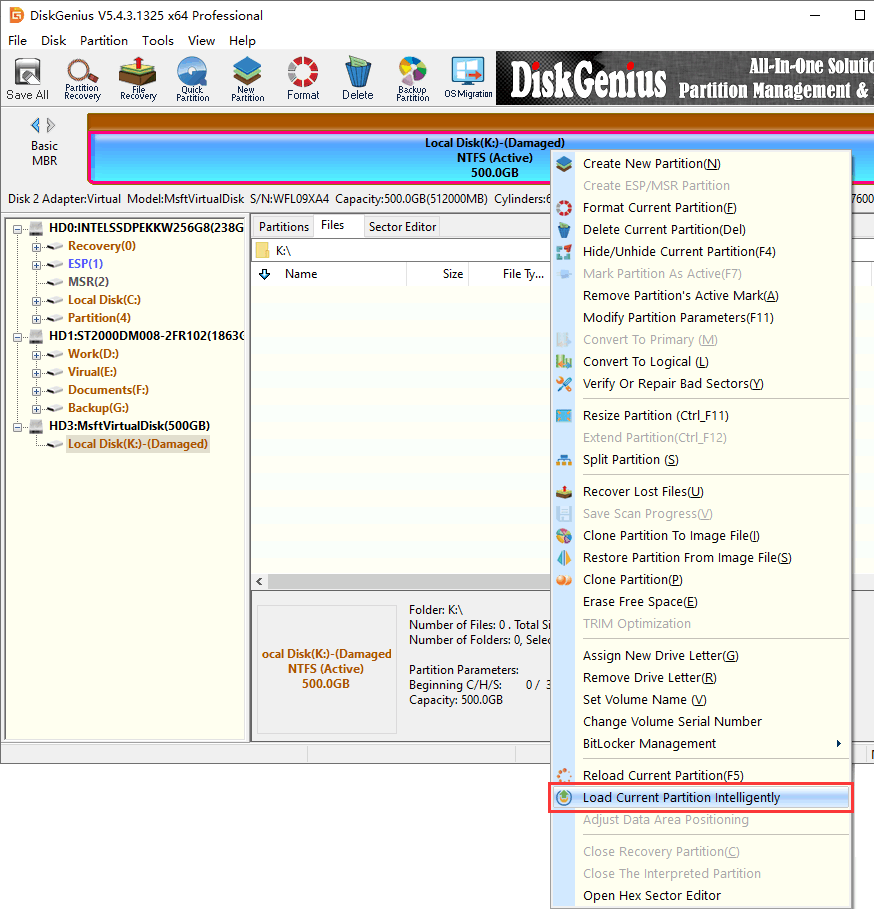
Step 1: In DiskGenius (old name PartitionGuru), select the inaccessible drive and click Tools > Load Currently Partition Intellegently.
This function should quickly load lost files without any scanning, after which you can copy wanted data to another drive. If this function does not work on your disk, then move to Step 2
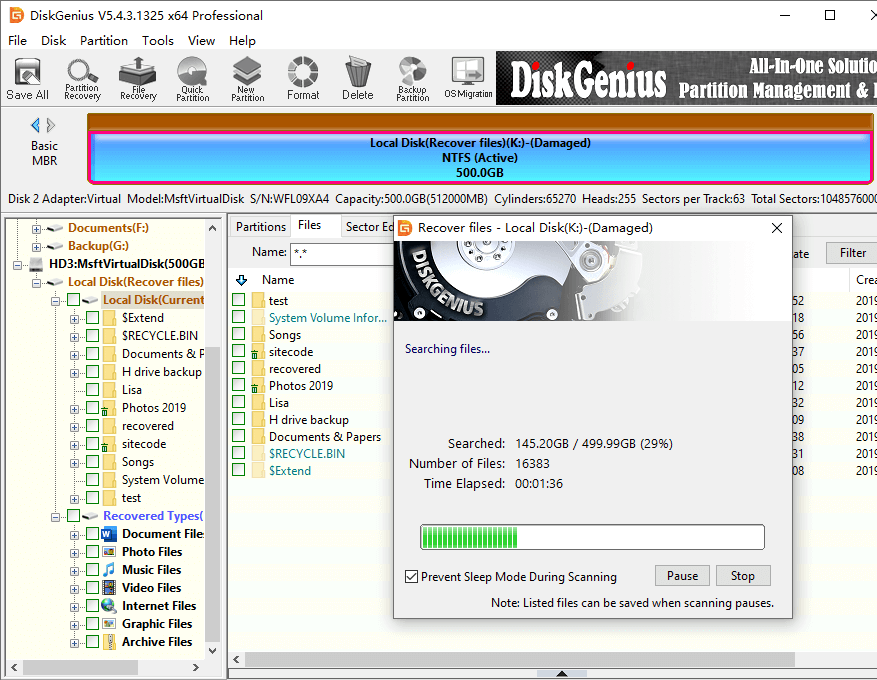
Step 2: Select the corrupted partition and then click “File Recovery” button.
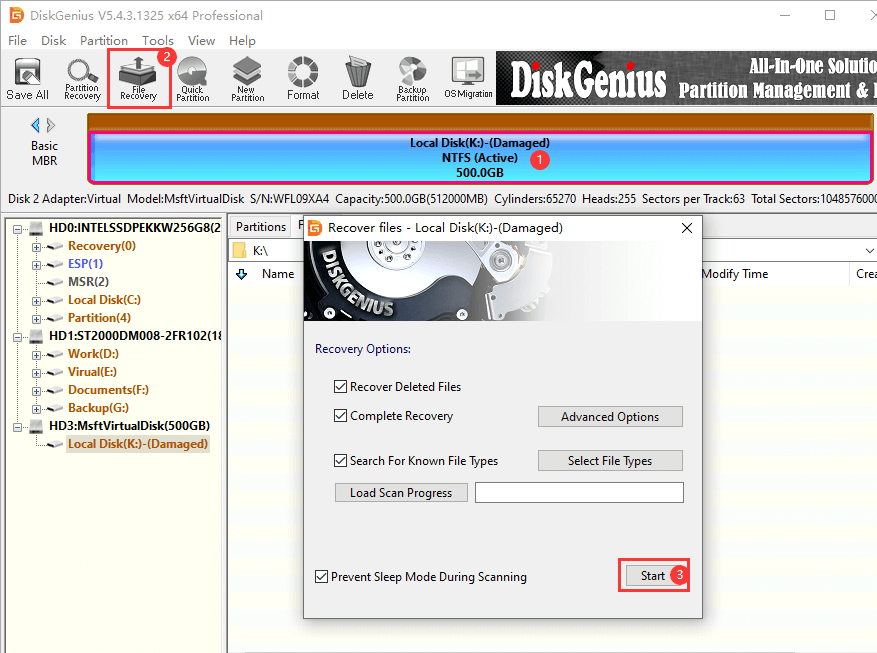
Step 3: Click “OK” button and DiskGenius (old name PartitionGuru) starts to scanning the partition. Lost files will be listed during scanning. You can double click file to preview it as long as files are listed.
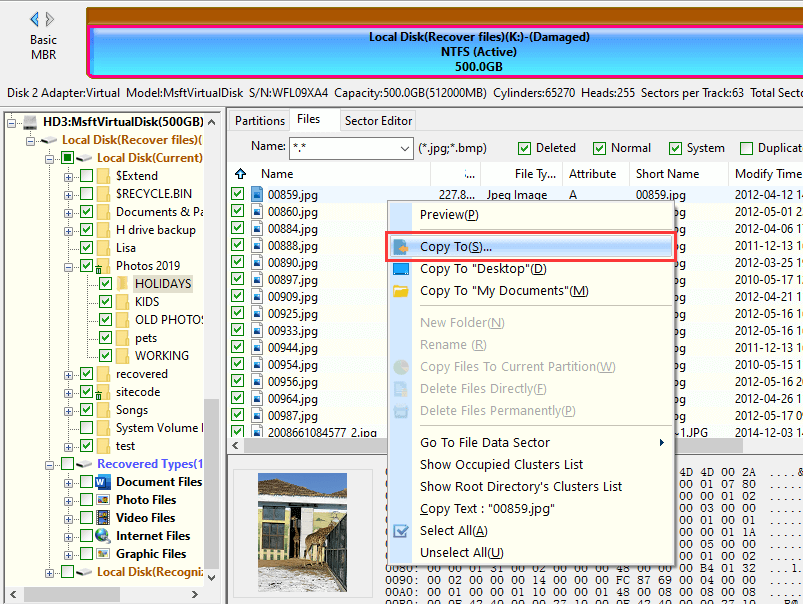
Step 4: Copy and recovery. Select files you want to recover and right click to choose “Copy to“. Then you can set desired location to save recovered data.
Fix “the format did not complete successfully” error
Note: formatting or deleting partition causes data loss, please make sure that valuable files are backed up before trying following solutions.
Solution 1: Format pen drive with Command Prompt
Step 1: Open Command Prompt. Click Start button to select Run and type “cmd” in Run box and press Enter.
Step 2: Type FORMAT X: /FS:FAT32 /Q /V:PenDrive (Replace X: with the actual drive letter of your Pen Drive)
Solution 2: Recreate partition in Disk Management
Step 1: Open Disk Management. Press key combination Windows + R to open Run dialog box where you should enter diskmgmt.msc and click OK.
Step 2: Right click the partition that Windows cannot complete format and select “Delete Volume“.
Step 3: Now the area will become unallocated space from which you should right-click to select “New Simple Volume“.
Step 4: Click Next buttons on the wizard popped up until new partition is created successfully. The newly created partition will be formatted when the process completes.
Solution 3: Check bad sectors for the disk that didn’t format successfully
If Windows still cannot format this drive, you need to perform bad sector checking for the disk in question.
Step 1: Install and run DiskGenius (old name PartitionGuru) on a Windows computer.
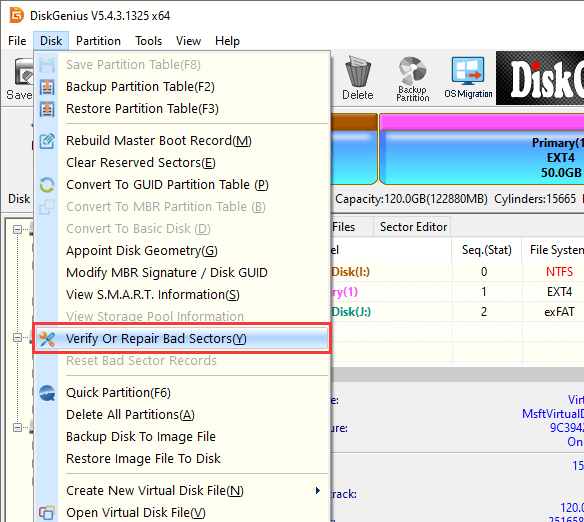
Step 2: Click the disk on where the format did not complete successfully, and click “Tools” – “Verify or Repair Bad Sectors“.
Step 3: Click “Start Verify” button on the popped-up window and DiskGenius (old name PartitionGuru) starts to scan bad sectors on the selected drive.
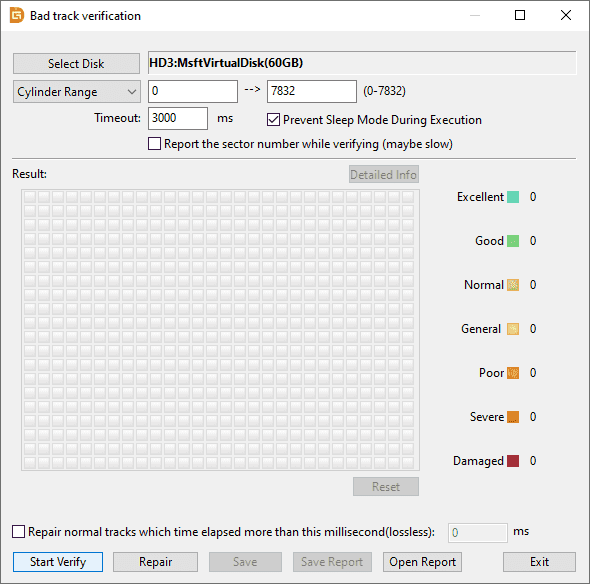
Step 4: Red block represents bad sectors as follows:
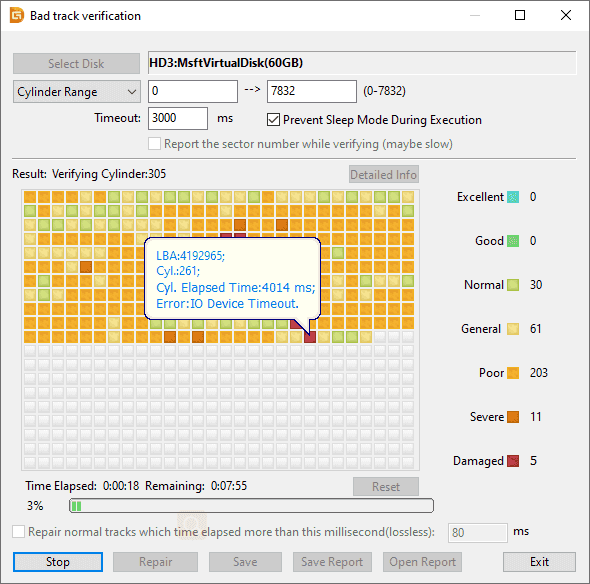
Step 5: When the process is done, you can click “Repair” button to repair bad sectors.
Warning: Repairing bad sectors permanently damages data stored on or near bad sectors. If files are important, you should backup files before clicking “Repair” button.
Conclusion
In this post, we talk about how to fix “The format did not complete successfully” without losing data, and you can follow this guide to get the error fixed safely and easily. Should you need any help regarding this issue, feel free to leave a comment or email us.