
Word documents get lost in Windows 10/8/7? Don’t be panic; you can recover lost, deleted or unsaved word documents easily and safely. This guide provides multiple solutions to help you get back lost Word documents, and it works on Word 2003/2002/2007/2010/2013/2016/2019/users.
Scenarios that need Word file recovery
It’s really a painful experience if an important Word file gets lost. Therefore, it’s necessary to learn some Word file recovery skills to recover lost Word documents. This article explains steps that you can use to try to recover the lost document.
- Accidental deletion of important files;
- Formatting partition / disk
- Virus / malware destroy
- Unsaved Word documents after editing
- Application errors
Method 1: Recover deleted Word documents from Recycle Bin
Sometimes a Word file may be deleted by accident, for our fingers often act before the brain warms up. If the file is deleted just from hard disk and it is easy to recover it from “Recycle Bin”: go to the Recycle Bin and locate the lost Word file, and then right click it to select “Restore”.
Method 2: Recover deleted / lost Word document files using free data recovery software
What if the Word file is deleted by “Shift + Del” keys or the “Recycle Bin” is emptied after the deletion? The deleted file can’t be restored from “Recycle Bin”, then the third-party Word recovery software Eassos Recovery Free will be the best choice to recover Word document.
If the Word file is deleted, the best way is to use Eassos Recovery Free to recover data. This program is powerful enough to recover deleted or formatted Word files as long as files are not overwritten.
Eassos Recovery Free is by far the most effective and easy-to-use Word file recovery software, which empowers you to recover DOC, DOCX documents without any difficulty.
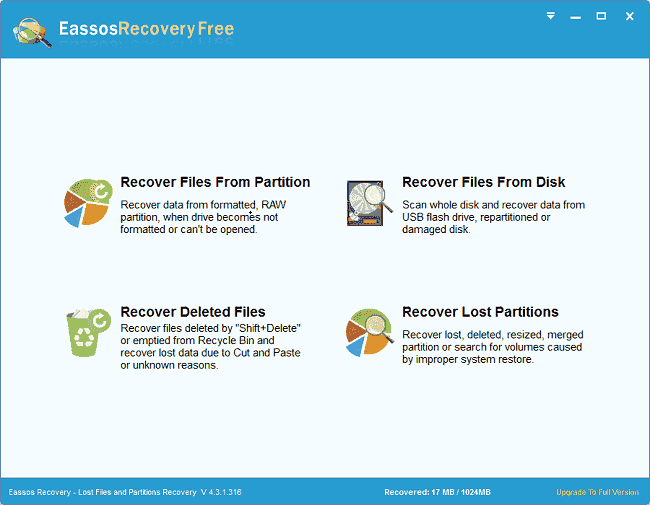
Step 1: Launch Eassos data recovery software, select the recovery mode depending on data loss causes.
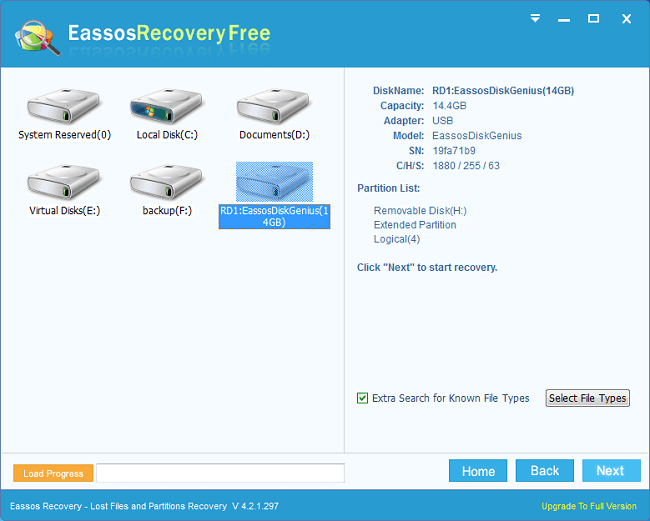
Step 2: Select the disk where lost Word documents were stored and click Next to search for lost data.
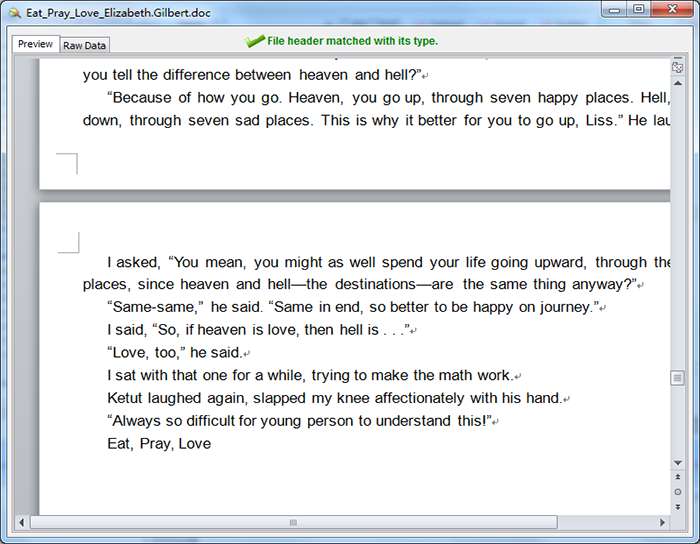
Step 3: A full and quick scanning will start; during which you can preview files you see. The following screenshot of Eassos recovery software is previewing a Word document.
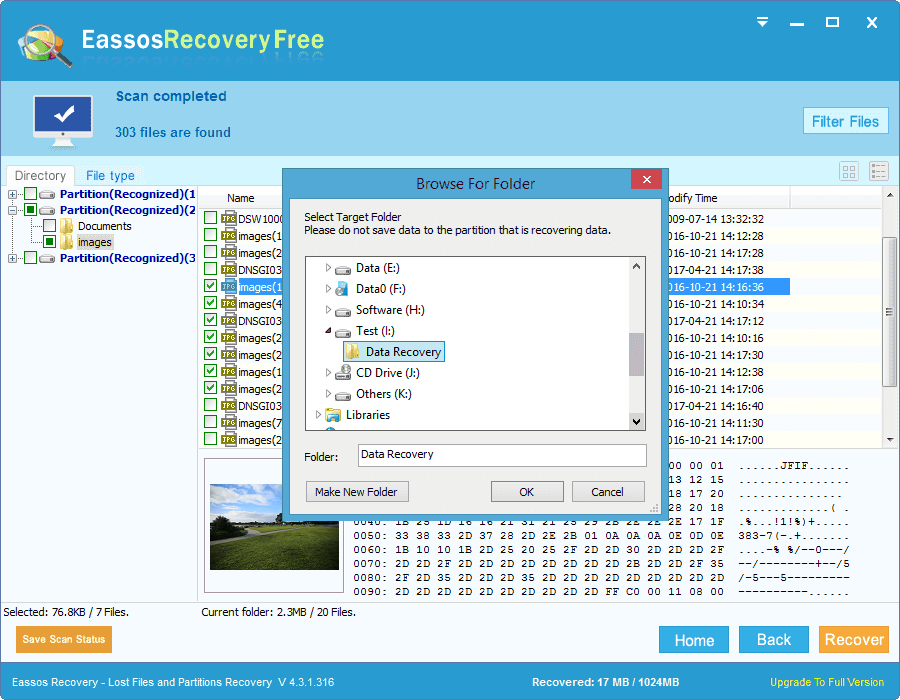
Step 4: Select files you want to recover and click “Recover” button to retrieve them back.
Other methods to recover deleted / lost Word document files
Microsoft Word documents may get lost in some situations. For instance, Word file may be lost if an unexpected error occurs that forces Word to quit, if you encounter a power failure while editing, or if you close the document without saving changes.
Search for the original document
- Click “Start”, click “Search”, and then click “For Files or Folders”.
- In the Search for files or folders named box, type the file name.
- In the Look in box, click “My Computer” (the searching range can be narrowed down if you know that the lost Word file is in a specific area,).
- Click “Search Now”. If the Search Results box does not contain the file, proceed with the following steps to search for all Word documents.
- In the Search for files or folders named box, type “*.doc”. For Microsoft Office Word 2007 documents or Word 2010 documents, type “*.docx”.
- Click “Search Now”. If the “Search Results” box does not contain the file, view the “Recycle Bin”.
Search for Word backup files
If the operation “Always create backup copy” is selected, then there may be a backup copy of the file. To set this function, click “Options” on the “Tools” menu, and then click the tab “Save”. In In Word 2007, choose “Word Options” from the “Office” button. In Word 2010, choose “Options” from the “File” menu. To find the backup copy of the file, follow these steps:
- Locate the folder where you last saved the lost file;
- Search for the file with the “.wbk” file name extension.
If you find any files that have the name “Backup of” followed by the name of the missing file, then follow the steps below:
- Start Word and click items “File” and “Open”;
- Point to the arrow in the Files of Type box, click “All Files *.*”, select the file and then click “Open”.
If there’s no .wbk file in the original folder, search the computer for any .wbk files. To do this, take the following steps:
- Click “Start”, point to “Search”, and then click “For Files or Folders”.
- In the Search for files or folders named box, type “*.WBK”.
- In the “Look in” box, point to the arrow, and then click “My Computer”.
- Click “Search Now”.
Search for AutoRecover files
If the method above does not locate the lost file, search for AutoRecover files. Actually, Word searches for AutoRecover files every time that it starts and then display what it finds out in the Document Recovery task pane.
If Word finds the AutoRecover file, the Document Recovery task pane opens on the left side of the screen, and the missing document is listed as “document name [Original]” or as “document name [Recovered]”.
If this occurs, double-click the file in the Document Recovery pane, click “Save As” on the “File” menu, and then save the document as a “.doc” file. Manually change the extension to “.doc”, if you have to.
Search manually
If the Recovery pane doesn’t open, then search for AutoRecover files manually, as follows:
- On the Tools menu, click Options.
- Click the File Locations tab, double-click AutoRecover files, note the path, click Cancel, and then click Close.
- Close Word.
- Locate the AutoRecover file location.
- Look for files whose names end in .asd.
Search for temporary files
If the previous methods can’t find the file, try to recover temporary files:
- Click Start, click Search, and then click For Files or Folders.
- In the Search for files or folders named box, type *.TMP.
- In the Look in box, point to the arrow, and then click My Computer.
- If the Search Options are not visible, click Search Options.
- Click to select the Date check box, click in the last “n” days, and then change “n” to the number of days since you last opened the file.
- Click Search Now.
- On the View menu, click Details, point to Arrange Icons, and click by Date.
- Scroll down searching for files that match the last few dates and times that you edited the document.
Search for “~” files
Some temporary file names start with the tilde (~) character. To find those files, follow the steps here:
- In Windows, click Start, click Search, and then click For Files or Folders.
- In the Search for files or folders named box, type ~*.*.
- Click Search Now.
- On the View menu, click Details and then sort by Date.
- Scroll through the files for documents that match the last date that you edited the document.
Conclusion
So much for Word file recovery and you should be able to easily recover deleted, lost or unsaved Word documents on your own now. Should you need any help or have any questions, please feel free to contact us.