Updated on May 14th, 2021
This post tells how to fully evaluate Eassos Recovery in various data loss situations. This page, together product user guide, can guide will give you a clear idea how this product work, whether lost files can be recovered, what’s the correct steps to use the software and other questions you might ask during the recovery process. Thus it is strongly recommended you read the entire article carefully and follow steps to test recovery software.
Before using data recovery software you should make sure:
- The drive that loses data can be seen in Windows Disk Management (Right-click “This Computer” and choose “Manage” and click “Disk Management”), otherwise data recovery software won’t be able to recognize the disk.
- There not severe hardware issues on the drive, such as bad sectors, power supply issue, etc. Bad sectors slow down or even stop scanning process. You can use PartitionGuru to verify bad sectors.
- Lost files are not overwritten. No new data has been written to the drive that contains lost files and no further operations have been done to the disk. If that happens, you’ll lose chance to get back all lost data.
Four steps to check whether it is the right data recovery software you are looking for
Step 1: Decide which data recovery mode to use.
There are four recover modes on the main interface of Eassos Recovery and each can fix a series of similar data loss issues. You can easily choose one based on how your files get lost, as there is concise description on each recovery feature.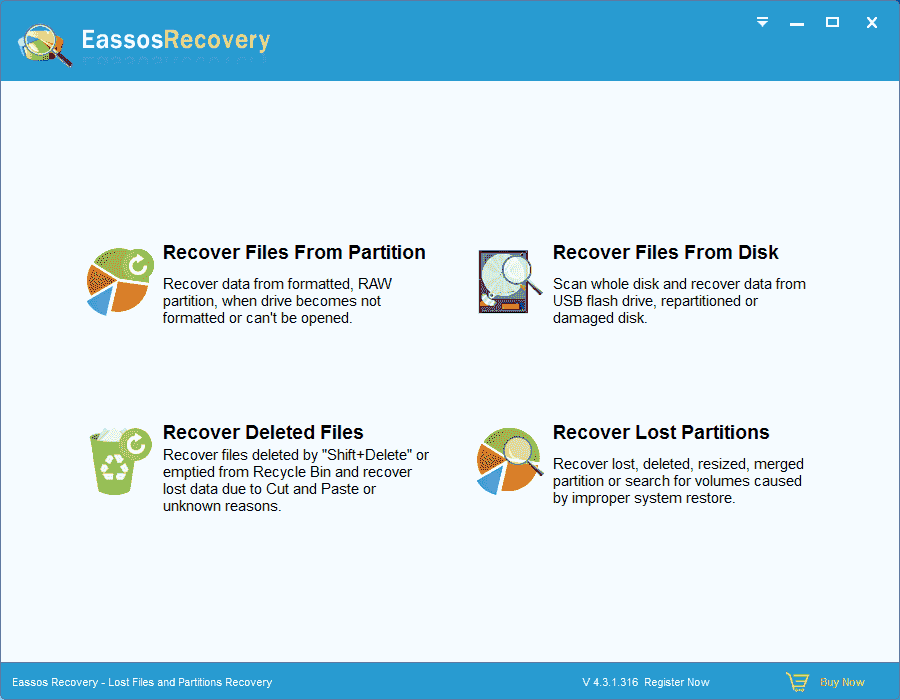
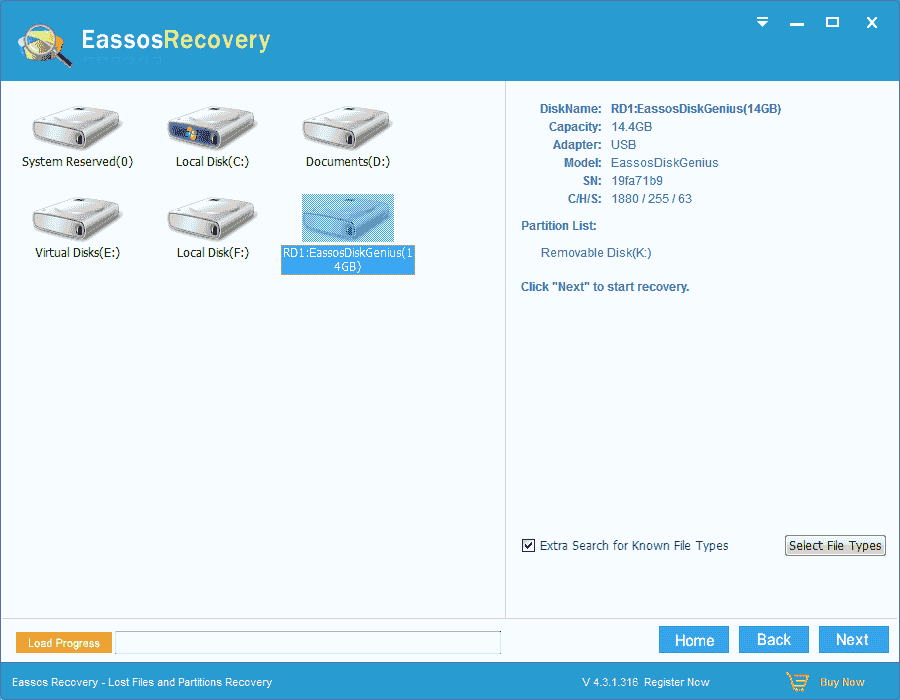
Step 2: Select partition/disk to scan.
Select the partition or disk where lost files were located and click “Next” button. If you choose wrong location to scan, you can’t find lost data.
Eassos Recovery performs fast and deep scanning at same time. It lists files while scanning is going on and allows users to preview listed files. Besides, you can pause or stop scanning at any time you need.
Step 3: Check whether needed files are in the scan result.
When canning is done, all detected data will be listed as below. Recoverable files are organized in two parts: Directory and File type. You can preview and filter files to locate which files to recover and whether files can be recovered correctly.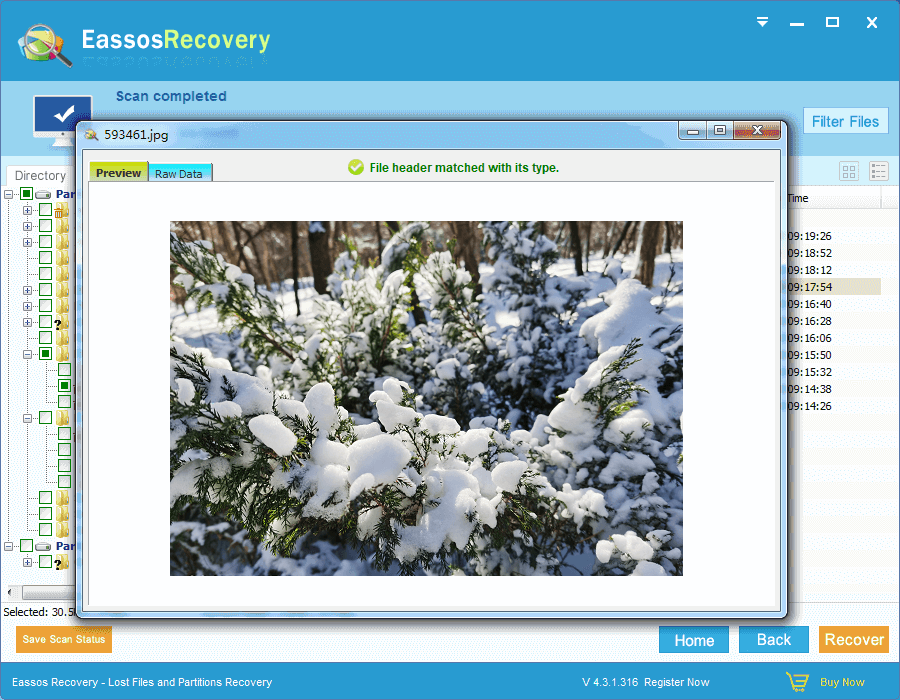
Notes:
Eassos Recovery can preview various files including pictures, photos, documents (e.g. Word, Excel, PPT, Text, etc.), video and audios files. Other files
The “Save Scan Status” button is used to save status of current scanning result into a .dgrp file with which you can resume current status next time instead of scanning from beginning.
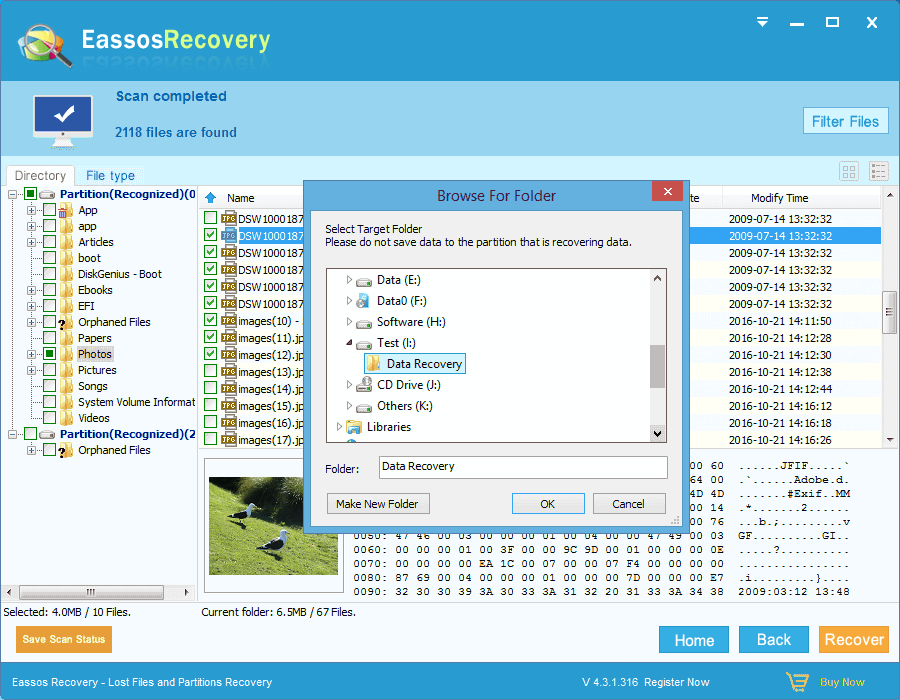
Step 4: Recover data.
Files listed by Eassos Recovery have not been finally recovered until they are saved to a location which shouldn’t be the partition or disk you are revering data. Thus you may need to prepare a second drive or external disk to store recovered data.