This article covers causes and solutions to “Please insert a disk into removable disk” error which usually happens to USB drive, pen drive, memory card, flash drive, etc. You can follow solutions in this page to fix the insert disk error without losing data.
What is “Please insert a disk into removable disk” error?
Computer users are very familiar with USB stick which is portable and provide space to store multimedia files. However, USB disks often bring about trouble when it is damaged or appear unexpected errors. For example, it may become unreadable accidentally. When you try to open it by double clicking drive letter in Windows Explorer, you got error message “Please insert a disk into removable disk” or “There is no disk in drive. Insert a disk and then try again” on a message boxed named “Insert disk”. If you check properties, the USB disk shows 0 bytes. Windows can’t detect the actual size of the flash drive.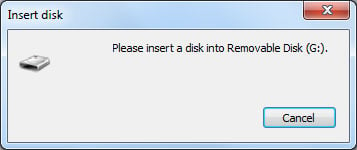
Besides, if you check Device Manager the flash drive placed under Disk drives has a different name, which means the controller fails to load manufactures firmware and is booting into fail-safe mode. In Disk Management, the disk has a drive letter but does not have media. That’s because system can’t mount the drive and controller tells Windows that is a Mass Storage device without delivering any information. If you format the disk you might get error message “Windows was unable to complete the format“.
Here is a real case found from Microsoft community:
“Hi guys! My 32GB USB flash drive works well all the time except today. I stored some files to USB disk from xbox and then plugged it to my laptop. It shows up in Windows explorer, but when I click on it, it says ‘Please insert a disk into removable disk (G:)’. I disconnected and reconnected the USB drive again, but still get the error. I’m in panic mode, as I can’t access psd and ai files in this disk. Any advice to fix it or recuse my data?”
Causes of “Please insert a disk into removable disk” error
- Flash drive poor quality. Many users buy off-brand USB disks at low price but such kind of disks are usually not qualified. Manufacturers may use poor-quality or generic NAND memory chip which might contain bad sectors. Manufacturers count on controller to record bad sector and repair bad sectors with error correcting code, which won’t be noticed by end users. Memory with poor quality consists of frequent writes to flash drive, but each sector is only good for a limited number of write. This flash controller can’t compensate for high failure rate by adding more error correcting code.
- USB disk is corrupted. Improper handling such as remove USB disk without safely ejecting will cause inaccessible issue.
- Drive letter conflict. Every partition and removable storage device should be assigned unique drive letter; otherwise computer won’t be able to recognize it.
- Flash drive in safe mode. Controller in your USB disk didn’t load firmware, thus it is trying to find an alternative way by formatting, testing or driver reloading.
- Bad sectors or other physical damage. In some instance, this insert disk error means the disk has bad sectors or physical damage, such as the flash drive might have dropped to ground.
Solutions to fix “Please insert a disk into removable disk” issue
Solution 1: Assign drive letter manually
- Start computer and log in as Administrator account in Windows or other account with administrative privileges.
- Insert your flash drive into USB port. Right click Computer and select Manage, and then click Disk Management.
- Find and right click on the USB disk and select “Change Drive Letter and Path” in Disk Management. Tip: you can recognize the drive via size.
- Select a drive letter which hasn’t been occupied by other partitions.
Tip: If your computer installs PartitionGuru, you can use this free partition manager to assign or change drive letter.
Solution 2: Heat up or cool the drive manually
- Connect USB disk to computer and use a hair dryer to heat it.
- Wait for a while and reconnect the flash drive. If the disk still does not work, then try the same thing with compressed air to cool it.
- If it starts working you should backup data as soon as possible as it may stop working again.
Solution 3: Create a new volume
Importance: if no data on the drive or only unimportant data, then you can try this solution. If important files are stored on the drive, you should recover data first using data recovery software.
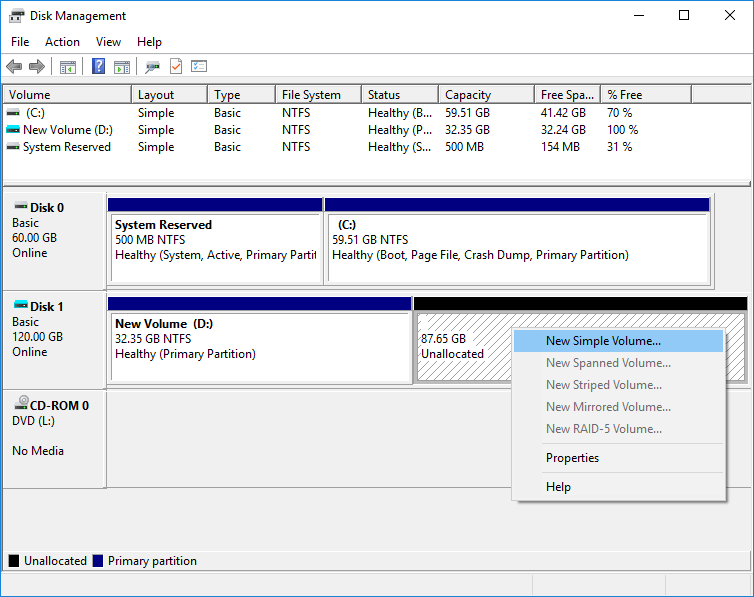
- Plug the USB disk to computer and open Disk Management. Right click on Computer or This PC icon from desktop and select Manage; The computer management utility window pops up, and you can click Disk Management on the left side.
- On the right part you can see disks and partitions in your computer, and then find out the plugged USB disk which might be shown as Unallocated. System can’t make use of unallocated pace, thus we need to allocate it
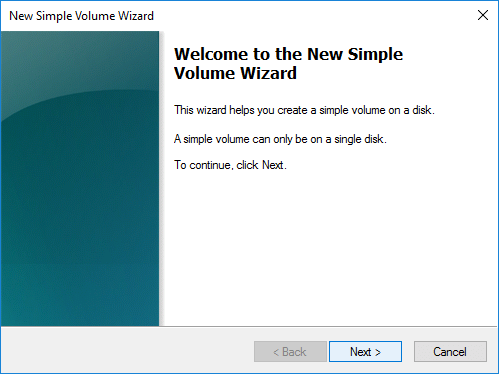
- Right click the disk and select New Simple Volume, and the New Simple Volume Wizard appears.
- Click Next button on the New Simple Volume Wizard.
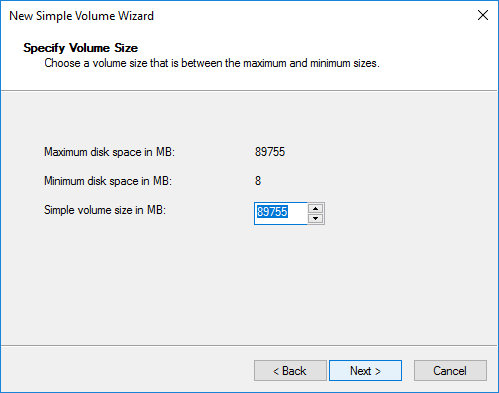
- Set partition size for the new volume, and click Next.
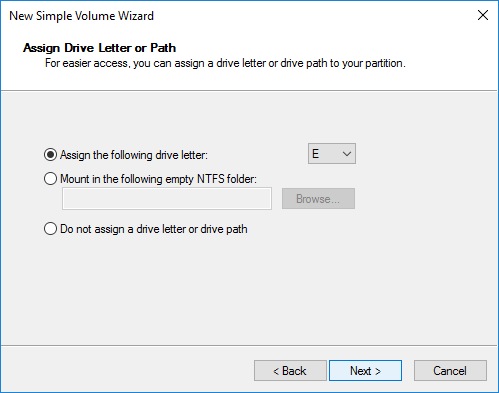
- Select drive letter and click Next.
- Select file system type, volme label,etc. Then click Next.

- Click Next button and complete the wizard.
Note for step 7:
- File system: FAT32 or exFAT for USB flash drive or memory card, while NTFS for external hard drive.
- Volume label: This is the name of your disk, thus you can name it on your own.
- Perform a quick format: select this option and system will perform quick format and recreate file system.
Steps to recover data when insert disk error happens
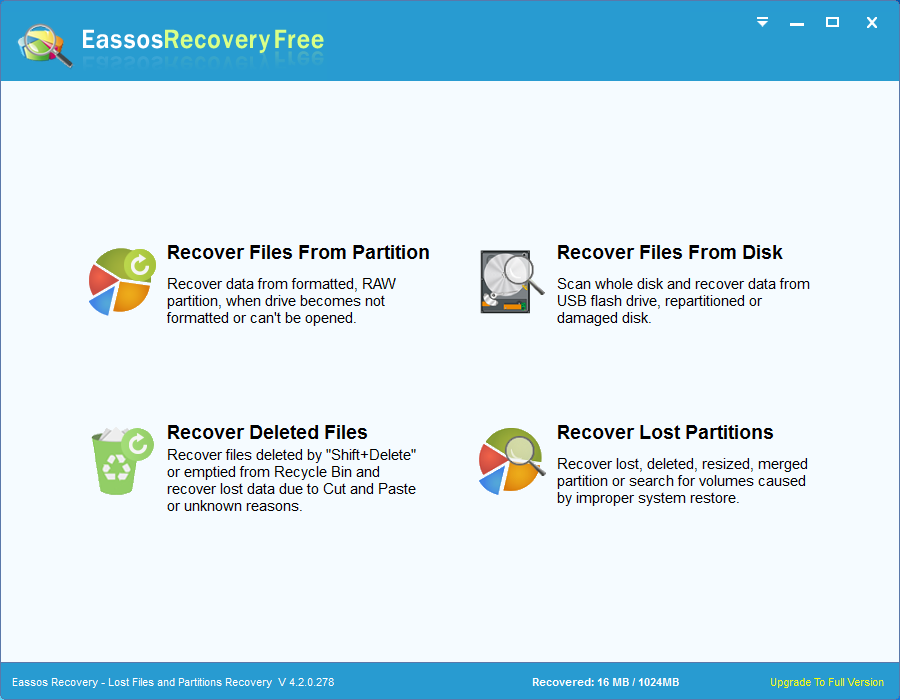
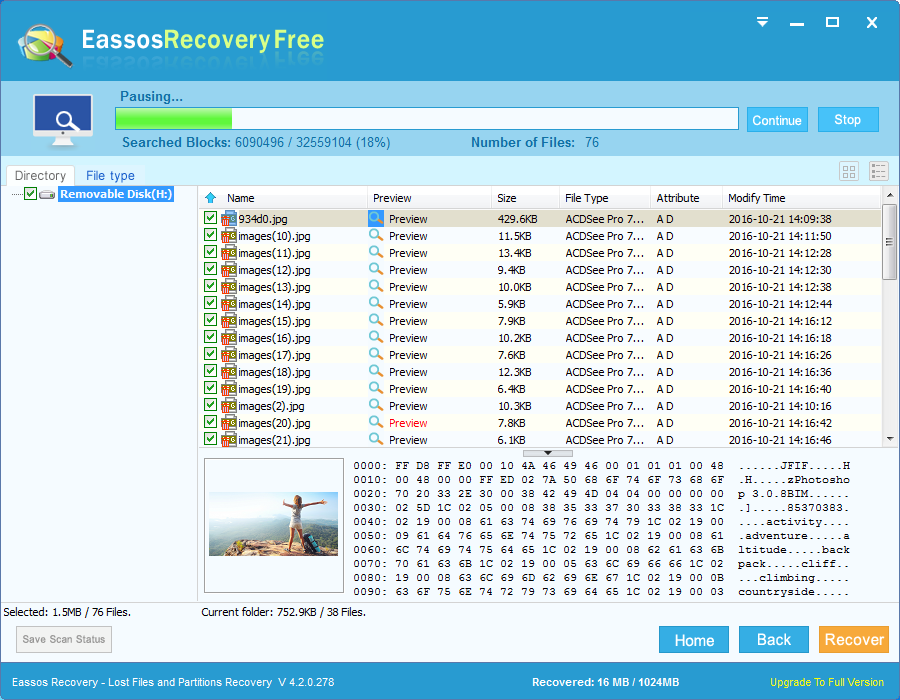
Flash drive data recovery can be done by free data recovery software as long as the memory chip is not physically damaged. Eassos Recovery Free is effective software designed to restore multimedia data including photos, video, audio, document, etc. from corrupted, damaged, reformatted or inaccessible HDD, flash drive, memory card. This software is developed with advanced algorithm that can fast and deeply scan selected location for lost data. The following part shows step by step guide on how to recover data from USB disk with free data recovery software.
The video guide to recover data from damages devices:
- Install Eassos Recovery Free and launch it. Click “Recovery Files From Disk” button from the wizard.
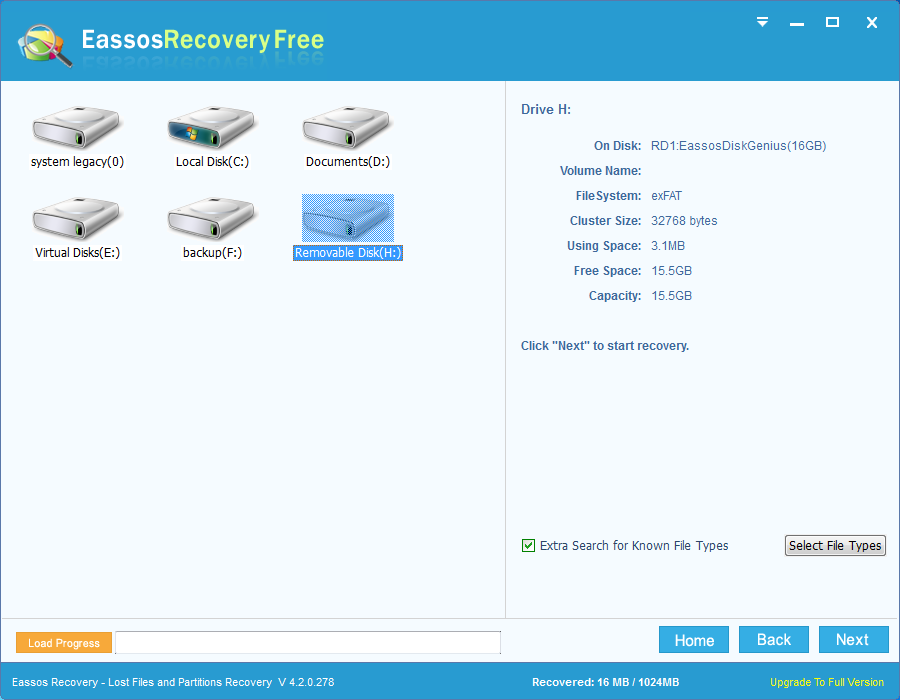
- Click the drive where you want to recover data, and click “Next” button. You can click “Select Type” button to choose file types for deep scanning.
- When scanning files, the software show scanning progress and displays files it just finds out. Thus you can view and preview files while scanning is going on.
- When scanning finishes or pauses, you can recover data. Select files and click “Recover” button. Then you can select desired location on your computer to save recovered files.
Note: If flash drive is physically damaged, it won’t be able to be accessed by recovery software. In that case you should send it to a specialized data recovery center.