Updated on May 14th, 2021
About Recycle Bin
Recycle Bin came to use since Windows95, which is used to store files that are deleted from hard drive. Recycle Bin offer a chance of making mistake for users, for operating system puts deleted files to Recycle Bin and those files can be restored at any time as long as Recycle Bin is not emptied. So maybe this is the reason why Microsoft calls it Recycle Bin instead of Shredder or something like that. How to perform Recycle Bin recovery?
Undelete files from Recycle Bin
Some may ask what if we delete files from Recycle Bin or delete file by Shift and Delete keys? Is it still possible to recover deleted files from empty Recycle Bin? The answer is “Yes”. Even common computer users are qualified to this task use proper data recovery tools such as Eassos Recovery.
Eassos Recovery is able to recover delete files either from empty Recycle Bin or external hard drive, USB flash drives, etc. that don’t have Recycle Bin. This tool has wizard interface that doesn’t require users have to be computer experts or data recovery professionals, for the whole data recovery process only needs several clicks of mouse button.
Manual of recovering deleted files
To recover deleted files, please click the button “Recover Deleted Files” on the main interface as follows:
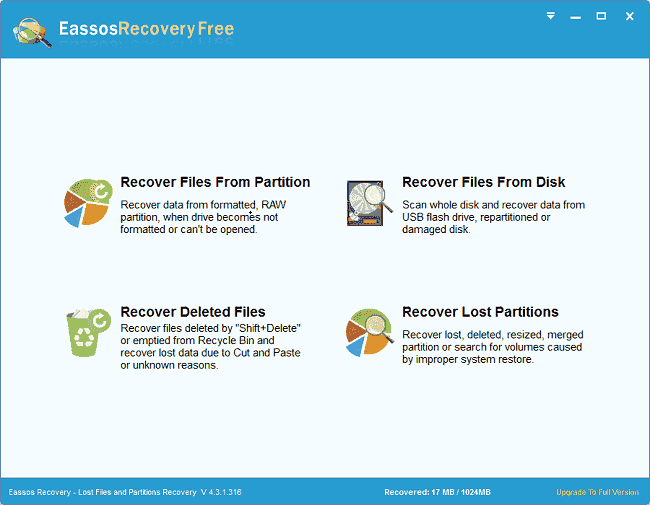
This function is carried out in 5 steps: select partition, scan files, select files to recover, select target folder and save recovered files.
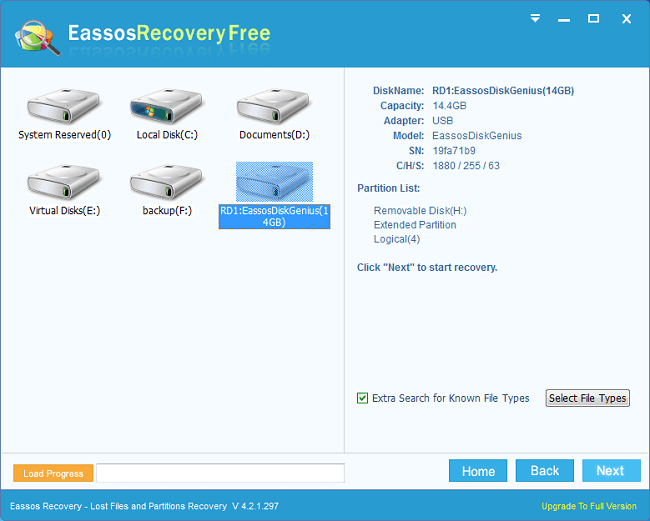
Select the partition that you deleted files and its information is displayed on the right panel, as shown in the following picture:
If the file system of the partition you selected is FAT32 or FAT 16, there’ll be a check box “Search for earlier deleted files” on the lower right corner. If you want to recover earlier deleted files, you can check it.
Make sure that the selected partition is the one you want to recover files and then click “Next”. Eassos Recovery starts to scan the partition and enter next step “Scan Files”.
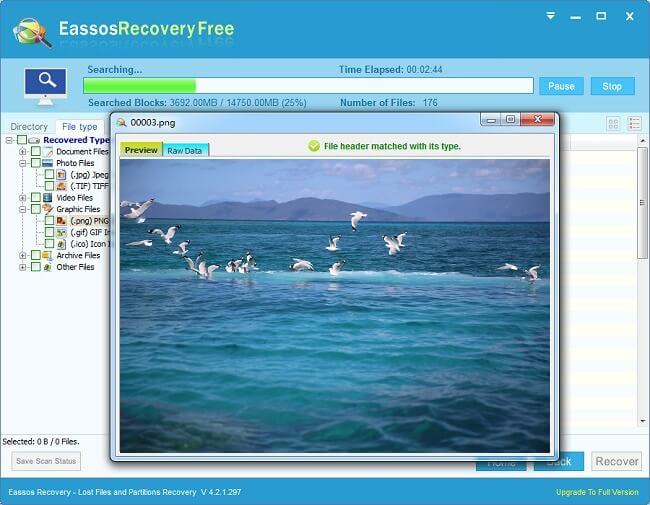
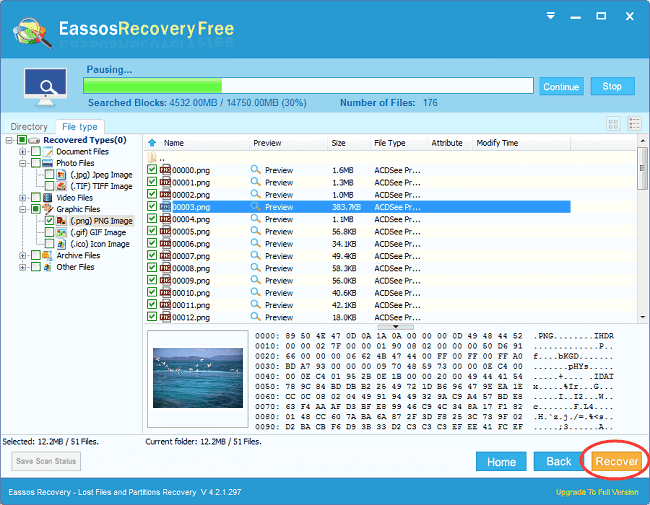
Finishing scanning, Eassos Recovery displays all deleted files it finds out and the way it displays files is similar to Windows Explore: file directory is on the left and file list is on the right part. There is a check box before every file or folder. Check all files and folders you want to recover and click “Next” to prepare for copying files. When you click a file, there’ll be a preview thumbnail of the file on the lower right part. Eassos Recovery supports previewing pictures, text files and Office documents, by which you can judge whether files can be successfully recovered.
By default, only deleted files are displayed. If you want it to display all normal files, you can check the option “Normal” and click “Refresh”. But normal files don’t have check boxes, so they can not be selected. If you just want to recover part of files, you can filter files by setting options for example, “Name” (supports name extension), attribute, size and modify time, and then click “Refresh”, as follows:
To copy files, you can click “Next” as well as use the context menu. Check files that need recovering and right click mouse button and on the popup menu select the item “Copy to”, and then select a target folder. For detailed operations, please refer to “Copy Files by Context Menu”.
Another way to copy files is to follow the wizard interface, i.e. click the button “Next”. Eassos Recovery goes to next step “Select Target Folder”.
Click the button “Browse” and select a target folder. To avoid secondary destruction, please do not set the target folder to the partition which is recovering data.
Before copying, you can set other copying options. The one is about overwriting. When there are equally named files existing in the target folder, Eassos Recovery will do corresponding operations according to your settings.
“Prompt” – It asks the user to select an operation when the file name you want to copy is the same as the one in the target folder.
“Overwrite automatically” – It overwrites the existing file automatically without asking the user.
“Skip it” – It’ll skip the file named the same as the one in the target folder without asking the user.
“Rename automatically” -It’ll rename the new file automatically without changing the existing file or asking the user.
Besides, if the check box “Cancel file checking state after it was copies” is checked (it is checked by default), if you unchecked it during the copying process, after you go back to last step you’ll find that those files copied already become unchecked. Those files that are skipped remain checked. Such a design aims that you can select these files again if you set another target folder.
If you set the target folder to the partition which is recovering data, Eassos Recovery will pop up the following warning message. You need to select another target folder.
Please select another target folder.
The step 5 – “Save Recovered Files” is shown as the following.
You can click the button “Details” to see the “File Copy Report”; on the following dialog box click “Save” to save the report to a text file.